Sunday, 31 July 2016

Nearing the end of the journey

Well I guess it's time for another update. We had a reasonable month and hopefully by the end of this coming month I might have everything done that is required for the final building permit. If that happens it will be the end of a two year journey from start to finish. So let's update you as to what happened this month.
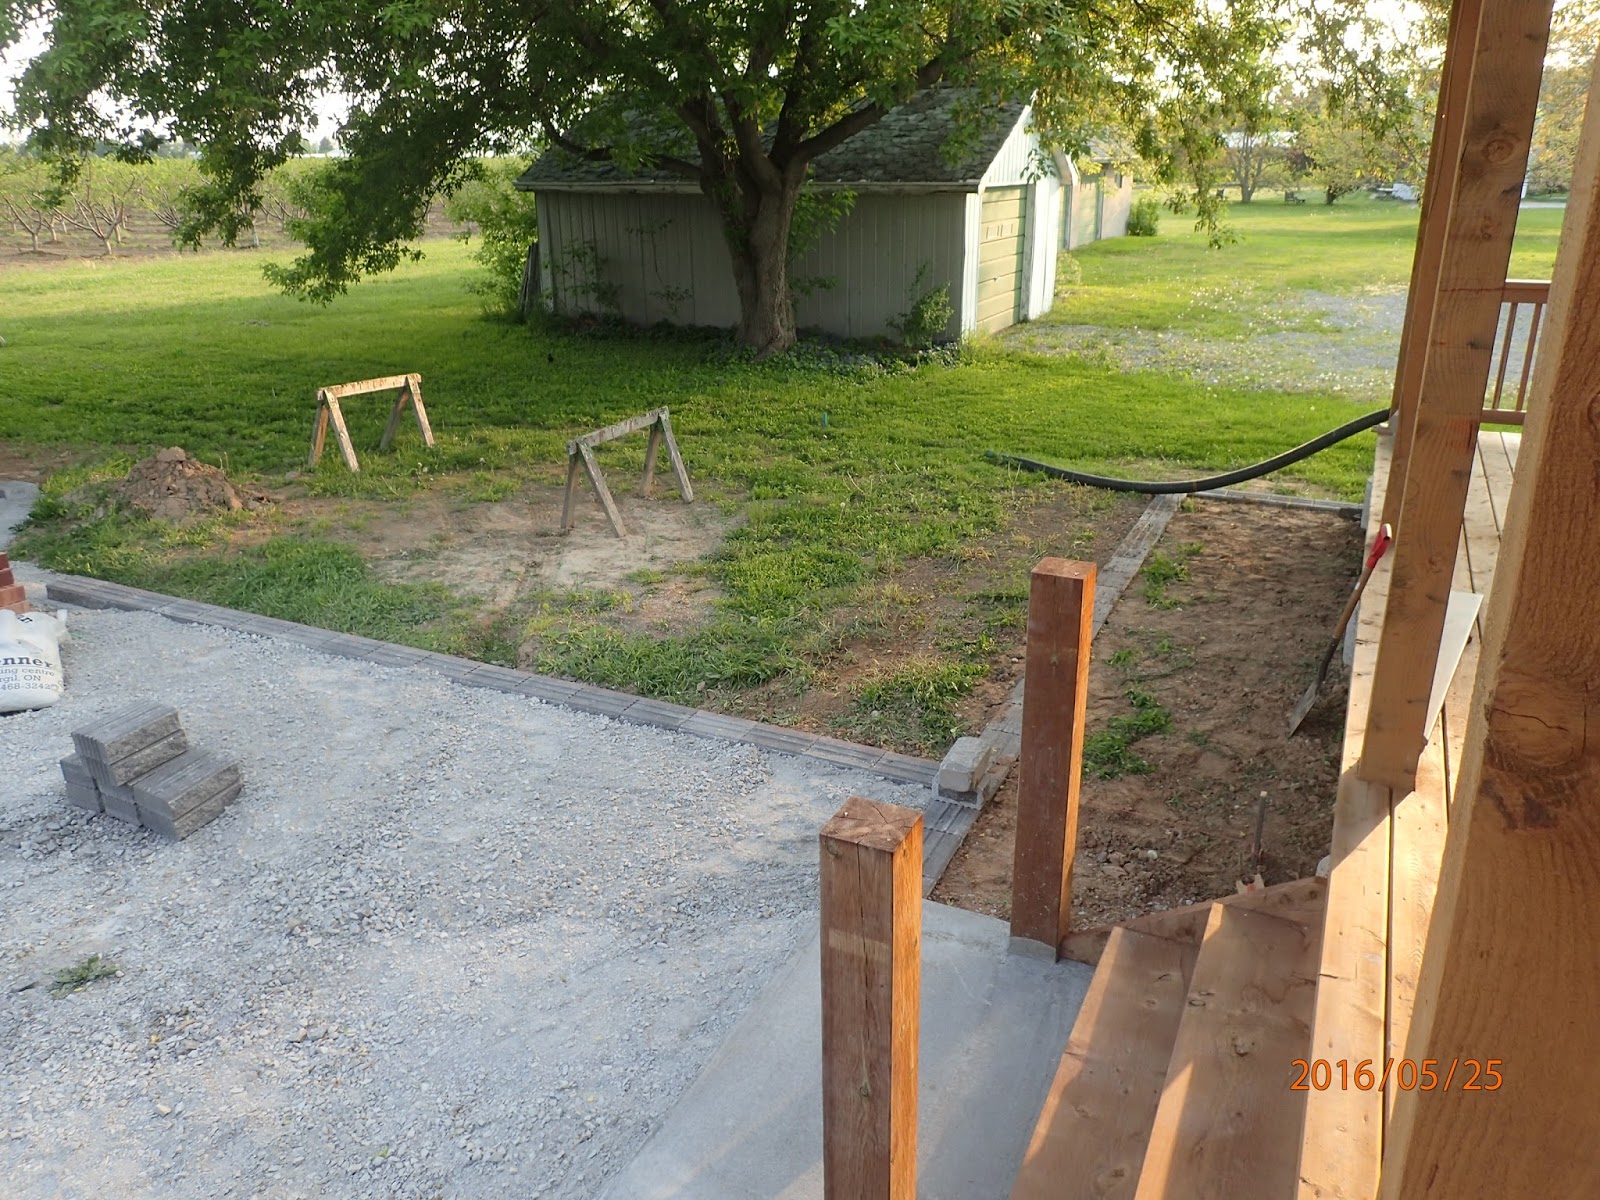
It was not an auspicious start to the month. I began by having a fellow over to finalize plans to install solar panels on my garage roof. Before he came over I decided to pull a stronger rope through the conduit I had installed when we backfilled the foundation only to find out that somewhere there was a blockage and the rope could not be pulled through. I determined that the blockage was underneath the rear deck so we bug down to the foundation footings on the east side where the pipe was and then dug down to the pipe on the south side which thankfully was only 3ft deep. We then spliced in a couple of pieces to bring the pipe to the top and then ran conduit around the deck to allow the future wire to be pulled through. This was a messy job but by the end of the day it was done. Here are some pictures showing the two holes as well as the outcome of the work. At a later date I installed the PVC conduit around the deck connecting the two pieces of black Big O pipe.


The following day I started making a small coffee table out of the leftover Fir boards for use on the deck. Once complete it received a coating of Teak Oil before being used. As well I picked up a load of red stone to continue working on placing this around the house on top of a weed barrier. I still need one more trailer load to finish this job which I will do later this coming week. Here are a couple of pictures showing the Fir boards prior to final glue up and the result of installing the decorative stone.


So for the following week we spent a lot of time working on the Router table. I needed to slot grooves on all the stiles of the door a 1/2" deep and I needed slots on one side of the rails 1" deep. I then needed to cut out the tenons on the end of the stiles to fit into the grooves on the rails. I did this all on my Jessum Router table using a 1/2" spiral router bit. The beauty of this table is that it has an indicator on it for the raising of the bit that is calibrated in thousandths of an inch so you can get really precise.  Here is a picture showing the table. In the second photo you can see me starting to cut out a tenon on one of the stiles. 


After all the boards were routed we could start on the glue up. Before we glued up all the boards I jointed a slight angle on one of the rails that would house the door hinge. I then routed out the hinges using my template and then took the first rail inside to test fit the piece. It fit like a charm so back to the shop to carefully fit all the pieces. This also included cutting out the panels from Baltic Birch plywood. Once these pieces were all fitted in we took the door apart and then started the glue up process. I basically did one door a day leaving them in the clamps for at least 12hrs. Once the first door was done we took it into the house to test fit it. All that we needed to do was trim a little of the one side of the door to get a nice fit. On the whole all 5 doors went pretty well. The worst one was the door from the spare bedroom to the bathroom. This opening was out of kilter and I thought I had installed the jambs nice and level but we ended up with a slightly bigger gap near the bottom half of the door and the jamb than I would have like. The door stop should still cover this but it could have been better. Here are some shots of the process and the first hung door.


Once the doors were installed we could start painting them. The two doors into the bathroom have received 3 coats of white semi-gloss and the door into the rear entrance area has received 4 coats of orange paint. Over the next week I will paint the two bedroom doors. Once the paint has dried will finish installing the door trim and then work on installing the last of the baseboard around these door areas. Once that is done all that will be left for upstairs trim will be trimming out the front entrance door and the associated trim in the front entrance. Here are a couple of pictures showing painted doors.


 Finally last week the one of the local stores, Canadian Tire, had a sale on some patio furniture. I picked up this teak table with 6 plastic wicker chairs for my deck. I now have a dining table on the deck that will get it's inaugural usage today.

Well as mentioned for the coming couple of weeks I will finish the door and trim, install the last of the landscape stone, and start work on building the vanity for the spare bathroom. I will also get the surveyors in to do the final grade survey so that I can get my final inspection done.

Well until next month have a great summer and enjoy your vacations.

Harold


Friday, 1 July 2016

Happy Canada Day

Well it's the First of July and for us here in Canada it is Canada Day. No work lots of things to do around town and Fireworks this evening. So I thought it was a good time to update you on what has been going on around here. One good thing is that as of now, knock on wood, all my appliances have been repaired/replaced and they all seem to be working smoothly.

Ok onto the house work. At the beginning of the month I spent some time installing some Casing around the interior door frames that were installed last month. Since I was short some trim I then picked up what I was short as well as door stop material and spent some time painting these pieces. Somehow I never got around to installing it yet so I guess that is still to come. I then started work on installing the trim on the front and rear deck. This is basically more of the rough cut Fir that I am using to cover up the beams. Here are some pictures of the front and back decks. I've cut some small strips of 3/4" by 3/4" Fir from the leftover and will cover the cracks in the corners at a later date.


Once that was done spent a little time forming up a small pad for in front of the man door into the garage and poured some concrete. Here is a picture of this job.


Then in the middle of the month my Brother and his family came down and we cleaned off the old shingles from Mom's garage and reshingled it. If you want to see a short video on this you can check out this link  on my Brothers Youtube Channel

The next thing we did on the house was to continue working on the rear deck railing. So off to the local lumber yard and pickup some clear cedar lumber. Let me tell you it looks great but it is not cheap. The railing is basically two 2by4's between the posts with one 2by6 on the flat on the top 2by4. We then screw square balusters to the 2by4 with 3.5inches between balusters. The code here states that for any deck more than 24"above the surrounding area must be railed and max spacing between balusters is 100mm or appox 4". Here are some photo's showing the deck railings as well as the stair railings. The rest of the railing will be built in July so that it is on the next months billing cycle.


 Next we took the time to build a small fence just beside my Air Conditioner. This will do two things, one baffle the noise a little towards the neighbour and also make it a little less visible from the street. This was just two 4by4 placed in the ground with dirt tamped around them and then some cedar deck boards on either side of a pair of 2by4's between these posts. This was then topped with a nice piece of cedar 2by6 on the flat. Here is a photo of the fence rail.


Next we spent a few days sifting dirt and spreading it out behind the rear deck towards the garage. Once we had enough dirt there we leveled it out rolled it down and then spread a little more dirt to bring it up to the level I wanted. Once it was all down we scratched the top with a rake spread some grass seed, raked it again, spread some more seed, raked it again, spread some more seed, raked it again and then rolled it. We then spent 5 days watering it off and on and we now have some green grass fuzz starting. I'll continue to keep watering it until the grass is well on it's way. Here is a picture showing the area I am talking about.


Now I had to go back to a specialty wood store near the middle of the month to pick up some for fir 1by6 for the deck trimming. While I was there I noticed a really nice piece of Peruvian Black Walnut they had. This was 20"wide by 12ft long. I thought this would be a great piece for the eat in bar top area in the kitchen. As the cost was only 250$ I decided to take it. Once we started working on it the first thing we needed to do was cut one straight edge down the 12ft. So we took some string stretched it from end to end and marked down a straight line trying to save as much of the width as possible. I then laid down a straight edge clamped it down and used this to guide my skilsaw. Once we had one straight edge we could use the table saw to cut off two 1.5" wide strips that I would glue to the bottom along the edge to give the impression of a thicker top than the 1" thickness that it was. Inside I screwed two pieces of 5/8" plywood to the top of the pony wall and then built three brackets from the left over walnut. These were varathaned and then installed before the top was installed. While this was going on we glued and screwed the small strips to the underside of the top in the garage and then rounded it over and sanded it all down before bringing it into the house for installation. I installed it onto the top of the plywood and then drilled and countersunk 6 holes to secure it to the top of the wall and then screwed up from the bottom of the plywood on the overhang to secure the top in place. We then plugged the countersinks with small pieces of walnut wood. Sanded the plugs smooth and varathaned the top. Here are some pictures showing the whole affair. The last picture is after one coat of varathane. I have now placed 4 coats on it and will most likely do at least one possibly two more coats.


Lastly we spent some time in the shop with my new/used jointer preparing the lumber for the 5 interior doors. First we jointed one face side smooth, then we planed the boards to the finally thickness. I then jointed one edge square to the face and then cut them down to the required width on the table saw. Here is a picture of all the rails and stiles standing awaiting the next procedure.


So for the month coming up I plan on trying to finish the doors and get them installed. I also want to finish the deck railing, spread some more stone around the house and possibly start on digging the last trench for a small retaining wall along the driveway between me and the neighbour. I guess you'll find out next month as to how I did. Until then for all you Americans Happy 4th of July and see you again in a month.

Harold


Sunday, 29 May 2016

Time for another update of the house that Harold built

Well I figured it was time to update you fine folks on what's been happening around here. Before I get into the house work I'd like to take this opportunity to advise you not to take any of my advice about appliances. Evidently I'm having a lousy track record in that department. The count is as follows, Central vacuum installed and then replaced due bad motor, Dryer fixed due to bad side wall and the drum kept hitting it, Dishwasher being repaired due to faulty pump motor for washing cycle, Fridge being replaced due to loss of coolant, Upright freezer has small problem with icing up at top of door but I'm living with that issue. And to top it off, due work cycle and issues getting the parts everything is taking an inordinate amount of time. Oh well can't cry over spilt milk.
As for the house this is what has been accomplished. At the beginning of the month I prepared the door jambs for the 5 interior doors. These door jambs are made from poplar lumber and will have three hinges per door as I am going to build poplar 5 panel doors for inside the house. Once they had been cut to size and the hinge recesses routed out we brought them inside and painted them. After they were painted we installed them on the Victoria day weekend which was 23 May. Here is a picture of the jambs installed.


I also spent some time at the end of last month building and installing a couple of small triangular shelves that fit into two corners in the living room. Later on I plan on installing a full length shelve above the windows as well for knick knacks. Here are two pictures one showing a close up of two shelves the other a shot of both corners showing the placement of the two shelves.


I next moved outside and continued working on the small retaining walls that go around the house and along one side of the garage to create walkway to the shed at the back of the garage. These walls are made up of what is called Wallstone and it consists of concrete bricks about 12"L by 4"H by 8"W. There is a base stone and then a capstone that sits on the base stone. These will provide a nice barrier and delineation between the grass and the house and the driveway and the grass. I finished the one on the east side I started last month and then I cleaned out the trench for the garage portion which had been started last year. Once these were done I dug out the trench along the back of the house and along the edge of the driveway connecting the back wall to the garage walkway wall. At the same time I dug out the area where I would be putting a pad for the stairs to the back deck. Once this was done I bored a couple of holes and installed pressure treated 6by6 timbers for newel posts for the stairs.I then placed compacted gravel in the pad and built a form for the concrete pad. After this was poured and cured we started installing the wall blocks along the back of the deck connecting the east and west portions already there. Once that was done we laid the wall between the back wall and the garage walkway wall. After they were all installed we went along and backfilled the walls with dirt on one side and gravel on the other side. The dirt between the back wall and the deck area was carefully tamped and sloped away from the house. This should help keep water away from the house and direct it towards the swale along the west side of the house. Here are some pictures showing the progress. First is completed east side, then the garage walkway. Third is the back trench with pad area. Fourth is the newel posts and pad poured with the next one showing part of the back wall. Sixth and seventh show the completed first layer. As mentioned a second layer will go on top and then we'll continue working on grading the gravel and dirt upto the walls.


Between this all we also took some time to build the railing along the west side of the back deck. This railing needs to be built to code as the deck is more than 24" above the ground. This railing is made of clear cedar 2by4's with a top rail 2by6 and then 2by2 spindles. The spindles are 3.5" apart which is just a little closer than the code required 100mm. Here are two pictures of this railing. The second is a bit of a closeup showing the clips used to hold the railing in place.


 Well that's all for now. I see that summer is finally here, we are in the low 30's C around my house. So far no air conditioner needed inside however only time will tell when we start it up.
Until next time keep cool and watch out for sunburns.

Harold


Saturday, 30 April 2016

Time for an update to the story

Well I guess its time to give you an update as to what has gone on around here. I'll start with a small project that I build early in March. I decided to make a small cart that could be rolled back and forth into the small cupboard above the basement stairs beside my office desk. This cart would have two levels and be just wide enough and long enough to fill up most of the floor space in the cupboard. Once complete I placed my larger inkjet printer on the top shelf with some small items and placed a few other items on the lower shelf. This is now wheeled into the storage area to free up some floor space in the house. Here are two photos showing the cart empty and then filled. The uprights on the left side are the handles used to move it around.


For the rest of the  month I worked a few extra days and did little in the house. I did find some time to clean  up the garage enough that I could bring the remainder of my tools to the garage from Mom's garage. I now have just a few items left at Mom's to bring over.
For the first week of April I spent time in the garage building a few cupboards to store items and arranged the tools around the perimeter of the garage. Some items may still move around but I think the large tools will stay where they are. I took the second week of April off from work and used the time to do some more work around the house. I finished up the Board and Batten on the rear deck and here's a picture showing the almost completed work.


With that done I could hook up my gas line for the BBQ and have even had the first BBQ on the deck. I still need to get some furniture and finish cleaning off the deck before the first full dinner can be had out there. Along with waiting for warmer weather as well. However, the weather was warm enough that I could spend time moving and sifting dirt from the topsoil pile that was at the front of the house. This dirt was spread over the ground at the side of the house and the front as well. Before doing this I carefully staked out the area and used a builders transit to site the area and calculate a proper slope to allow water to run away from the house and then down a swale to the front of the house and into the ditch along the road. I have managed to get a 1.5ft slope from rear of house to the front ditch a length of 110 ft. Once the dirt was spread out I leveled it and then rolled it. I then added more dirt where needed and rolled it again. Once the ground was all leveled and rolled I used a rake to loosen the top portion and spread out some grass seed. After the first spreading I raked it again and then spread out some more grass seed. Once this second layer was down I raked it again and then rolled it to ensure the grass seed would stay in place. I then watered the area and Mother Nature was kind enough to water it as well over the past week. After ten days I see the grass has started to grow. Hopefully in an other week it will actually look green there. Here are some photo's showing the side of the house and the front of the house during and after the seeding was all done.


After this was done I spent some time making up a small bench for installation at the rear entrance. This would be used to sit at while putting on your footware. The framework was made from some of the leftover Oak used for the board and batten and the top was make from Maple and Teak strips. Here is a picture of the seat in the back entrance. 


Lastly I took some time to line up and calculate some heights for the next small retaining wall outside. This wall will be along the East side of the house from my back entrance towards the rear of the house. I then bug a trench about 4-6inches lower than the first course of stone and filled it with tamped down gravel. Either next week or the following I'll install the actual stones on this base. Here is a photo of the area.


For the coming month the plan is to work on the door jambs for the interior doors and possibly start work on building the doors as well. Also I want to do more landscaping outside. I need to build one more set of steps to the rear deck and I also need to look at putting up the trim over the decks as well as finishing off the railings. How long all this takes depends on weather and how much time I have. 

Lastly I now have all my appliances in the house. The last three arrived on Apr 12 which was the stove and washer and dryer. Since the dryer and the stove were Natural gas I had a gas fitter come in and hook them up. Unfortunately the dryer went "clunk, clunk, clunk" once it was turned on. Turns out the drum was hitting the skin panel. Also unfortunately the repair company and or Maytag screwed up and sent the wrong colour panel for the repair. Then the second panel they sent was damaged in shipping. So 18 days later I still do not have a working dryer. They now hope to fix it this coming Tuesday providing the panel shows up and it's the right one and undamaged. 

So that's all for now. See you again maybe towards the end of May or if something big happens sooner.

Harold