Saturday 29 November 2014

Well we had quite the day today. The brother and his two oldest sons came down to give a hand. So today was "Insulation 101" day. However before we get to that story lets see what we did for the rest of the week.

On Sunday with some pretty decent weather in the morning I managed to get on the garage roof and finish off two cycles (8 rows) of shingles before the wind more or less kicked me off the roof. It was time to come down anyway. My back and legs are not as young and supple as they used to be. I forgot to take a picture of this so nothing to show for the work that was done

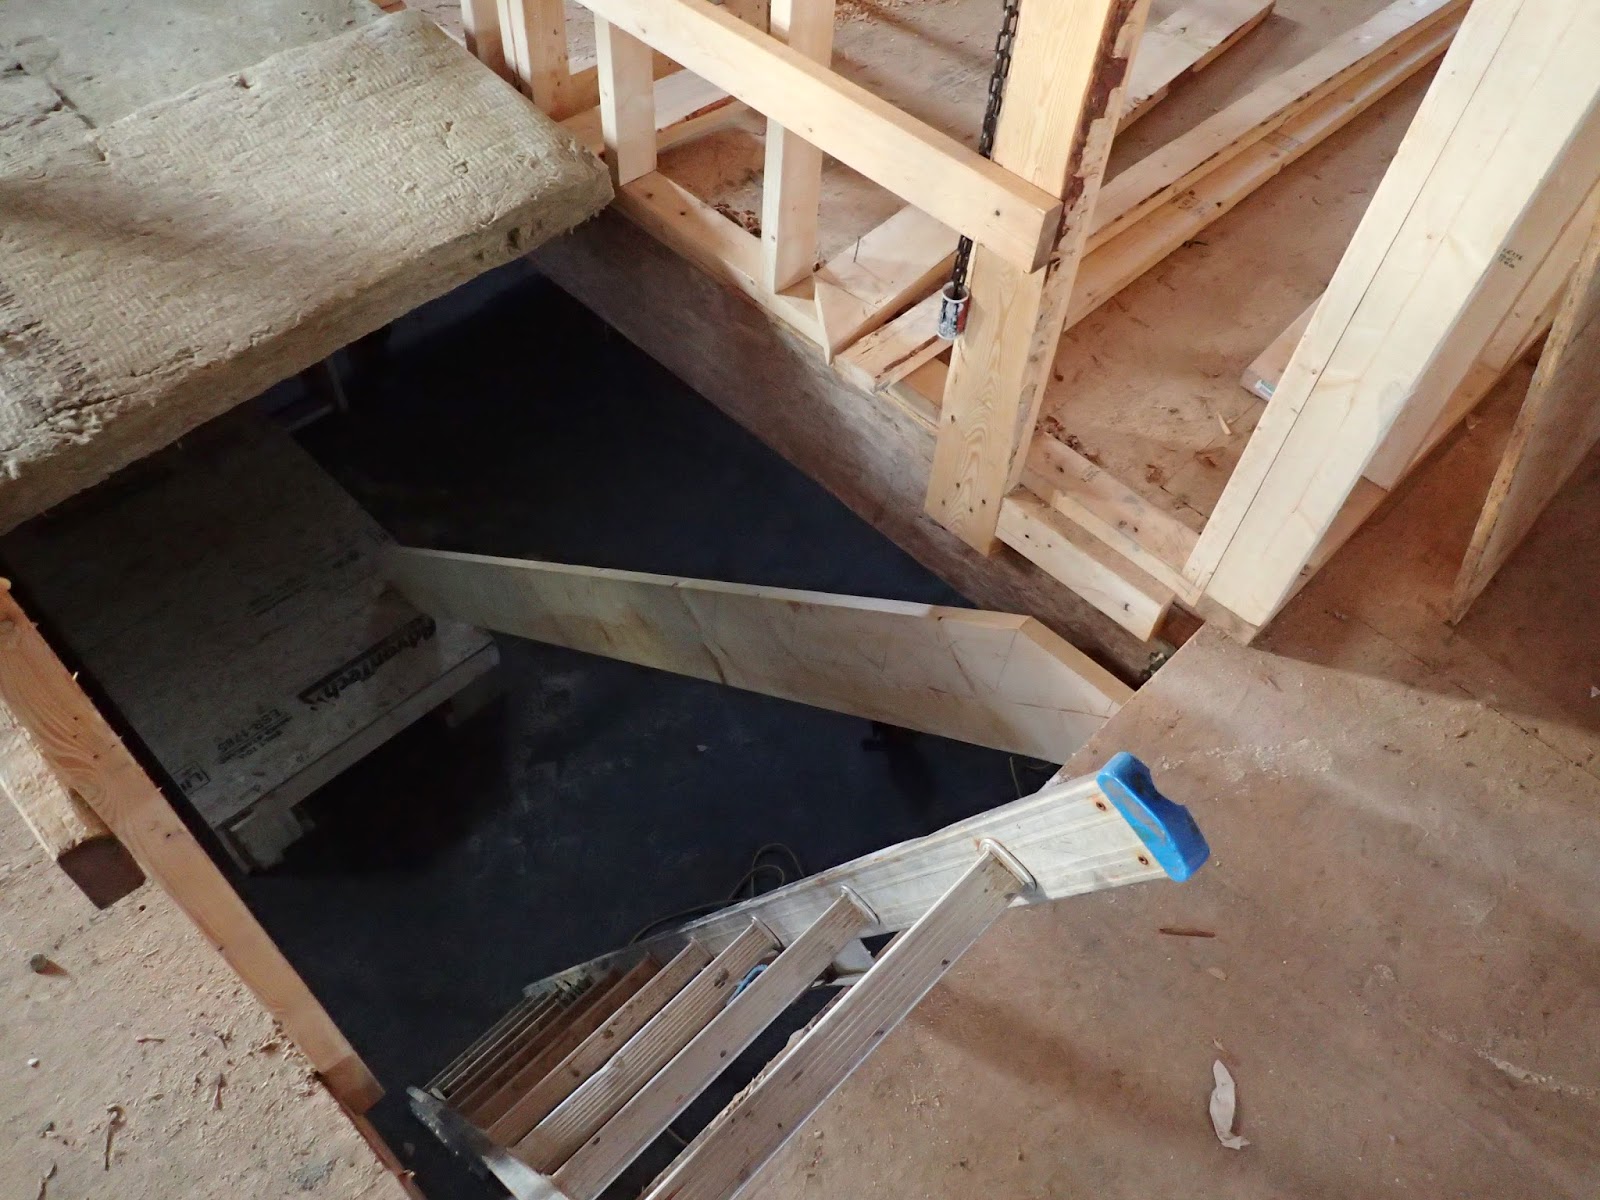
On Monday I finished off the stairs by building the two bottom steps that come off the platform. This now made my access into and out of the basement complete. I then went outside and did some work on burying warning tape over the electrical conduit that was beneath the graveled parking area. I also spread around about a yard of gravel that had been left over from leveling the garage and shed area prior to pouring concrete. I then proceeded to work on building a storage area above the staircase up against the exterior wall. I always thought about doing this however did not place it in the plans as I needed to see how the headroom went over the stairs. In the afternoon I had the building inspector come around to look at the garage framing and this passed. That was the only inspection required. So I can now look forward to trying to finish the garage and get all my stuff out of storage and into my own building. As the day continued the wind really started to pick up so I did have to deal with a few things blowing around that needed cleaning up and securing. Little did I know that I would be doing a lot more cleanup the next day.

On Tuesday I showed up at the house only to see multiple shingles lying on the ground. I walked around the house and up on the west side where the wind had come from there were some pretty big empty spots. So I cleaned up 28 shingles. Called the roofer and asked him to come soon as possible to repair the damage. Here you can see the damage. I am glad that I had the roofing deck armour installed under the shingles as this would have protected the house had we had any rain.


There had been reported up to 100km/hr wind gusts in the area. Since the roof was only a week old we did not have enough sun to seal the roof. As it is unless we get some really sunny days I don't think the roof will seal until next year. To make matter worse I believe we also have a problem with the shingles. When the shingles were installed the roofers complained and commented that 10% of them were lying with tabs that were bent upwards. They were coming right out of the bundle this way. These bent tabs would be like sails in the wind, especially with the strength of the wind we had had the previous night. I had noticed this problem on my garage roof however most of them had settled down on Nov 11 when we had lots of sunshine and temperatures that reached close to 20C. These shingles are a GAF Woodland Castlewood grey series and are not cheap, They are also warranted to remain on the roof at winds up to 130km/hr. However again that would be once they were sealed which these were not. I've emailed GAF and we'll see what they say. The two pictures below show them right out of the package and you can see the bend on the shingles. One will bend into the roof but the one underneath will bend up into the wind.


 The only good thing was that the roofer came out late Tuesday afternoon and fixed all the shingles at no charge to me for which I am really grateful. However as he said if this happens again it will be on your bill which I totally understand. So thanks to Dykstra Brothers roofing for some great customer service. Well after cleaning this up and sending the email to the roofers I went inside and did some work in the house. I continued work on the storage area above the staircase. This also extended into the one wall that would form the back wall of the office area. I also took some time to build the knee wall in the kitchen area that would form the back wall of the peninsula cabinets and allow me to add an eat at bar in the kitchen. Here are some photos showing this. First picture shows the storage area above staircase. This will also have storage access for the master bathroom and book shelves in the living area. The lower have will be complete storage accessed from living room side. The second photo shows the knee wall in the kitchen area.


On Wednesday I got to work expecting to see the roofer later that morning to fix the roof, since this was when he initially planned to fix my shingles. The plan was to ask him to finish my garage roof as well and just pay him to complete this. While waiting for him to show up I decided that with the mild weather it would be a good time to regrade the fill on the east side of the house to ensure a proper slope away from the house to the driveway area. I was almost finished with this when I realized all the damaged shingles were missing. I initially thought maybe the roofers next door had cleaned them up when they were cleaning up all their debris. No it wasn't them. I then realized that a shingle that had been lying over the ridgecap was no longer there. So I went around to the west side of the house and sure enough all the shingles had been fixed. Evidently they had shown up on Tuesday afternoon after I left for the day. This meant that there would be no roofers showing up to ask to finish the garage roof. So at 10am I started work on the garage and at 3pm I essentially came off the roof due light snow and being sore. However as a result all the shingles were now installed, the ridge cap was installed and about 1/3 of the ridge cap shingles were installed. Some where down the road an hour should finish the job. Here's a picture of the almost complete roof.


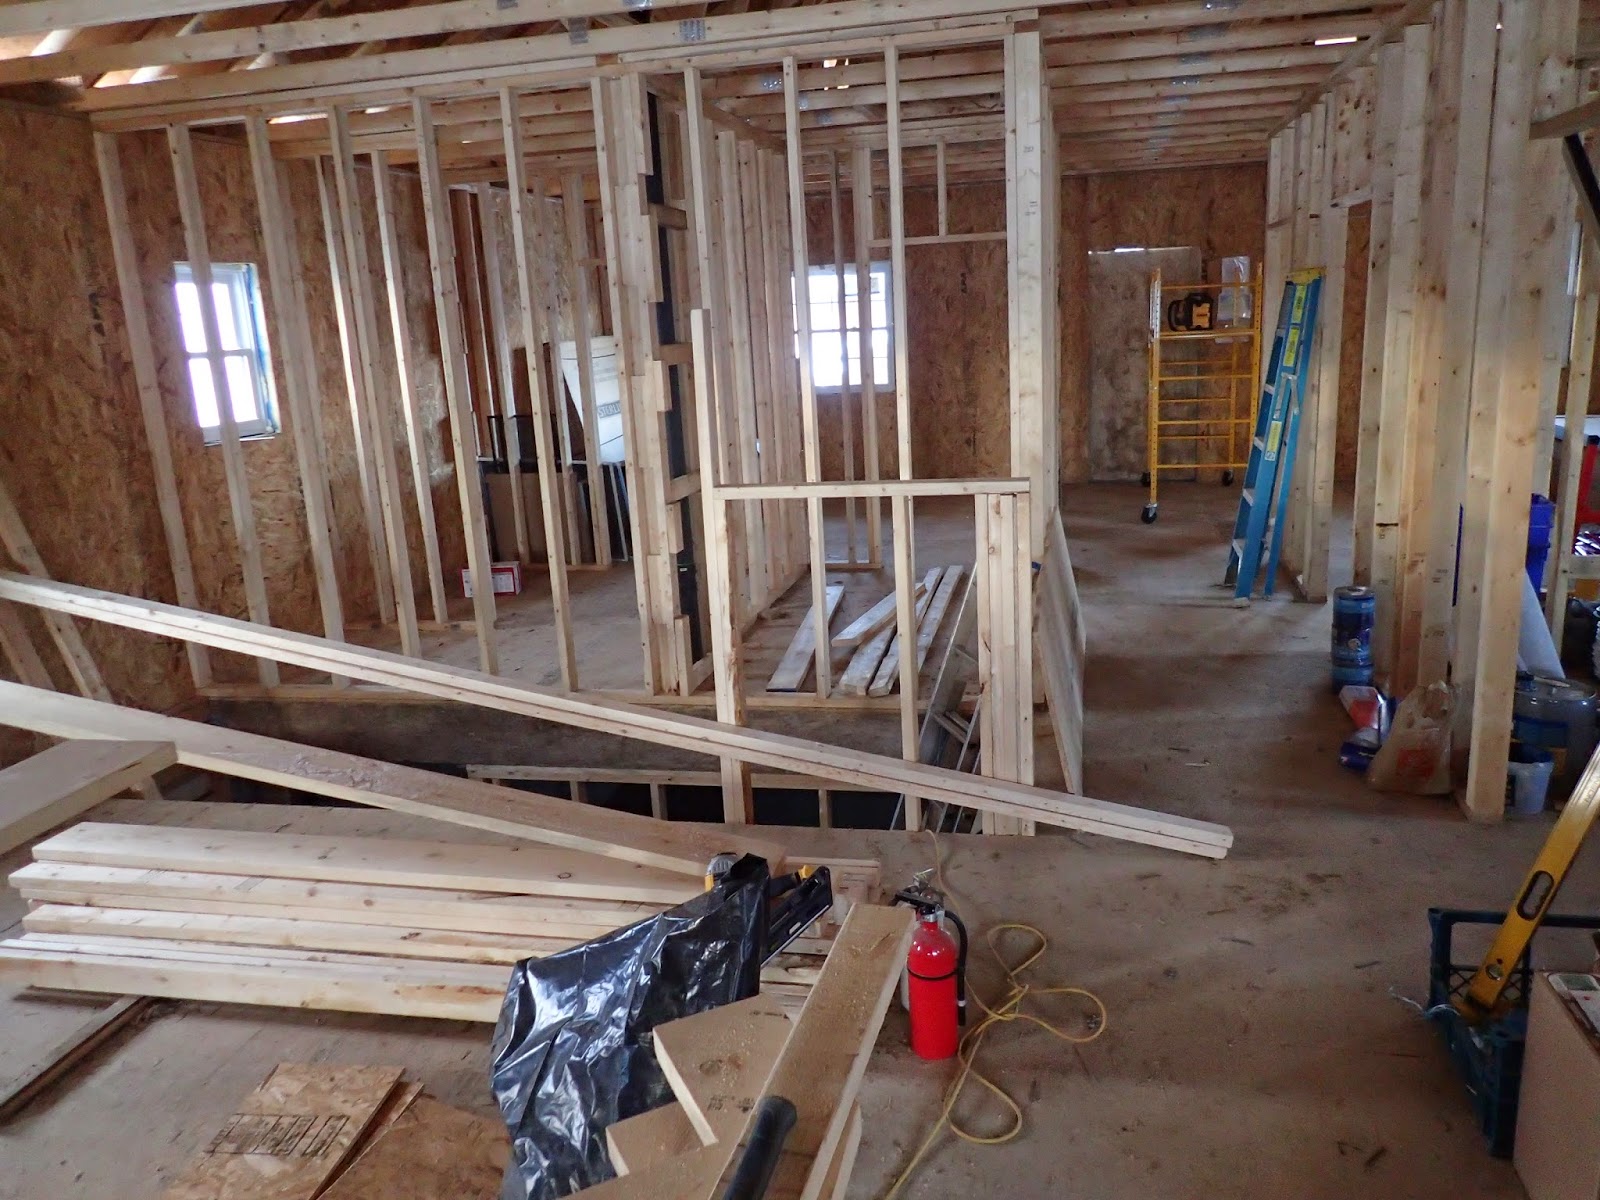
On Thursday I was supposed to have the Heating company show up to start work. However I received an email that they would be delayed due to an emergency furnace replacement job. However in preparation for their work I built my washer/dryer platform and started work in the basement laying out the walls for the Utility room. Here is a photo showing the utility room walls started and the lower plate for the basement bathroom as well.


On Friday I spent more time in the basement double plating all the walls under the joists and placing a single plate on the floor where required. All of these floor plates have a layer of sill gasket underneath as well to help protect them from the damp concrete. They were then secured to the floor using Tapcons which are a concrete screw. The photo below shows a little of what was done with the single floor plates and the double plates above them on the joists.


Now we come to Saturday which is where I started this weeks write up. Around 10am the brother with his two oldest sons came by to give me a hand in the garage. We spent about 5 hours there working on insulating the walls and most of the ceiling. We installed the four windows and we installed the normal mandoor along with the door handle. In first picture we have the two nephews working on installing the R20 in the walls. At this time they are approx 3/4 complete. In the second photo yours truly is installing the vapour barrier on the walls. In the third photo the two nephews are installing the rigid foam insulation, I had initially purchased for under the slab, and securing it to the bottom of the trusses. Later I will install OSB sheathing as the final ceiling. In the fourth photo the oldest nephew is installing an R12 fibreglass batt on top of the foam giving me a combined R22. I'll top this up at a later date to R40 with blown in cellulose. The final picture was taken at the end of the day. All I have left to do is install some R12 on the last row of rigid and then fill in the last row of rigid as well as finish off the vapour barrier. 


Well that was the week. Some bad news and some good news and some great help from the Brother and his two suns. Next week I hope to finish the interior of the garage, get a garage door installed, and I hope to finish off all the framing in the basement so we can get our framing/HVAC inspection and can then wire up the house. If all goes well I hope to be able to get the Spray foam people there mid December so we can heat the house prior to Christmas.
Well until next week take care and keep warm.

Harold 


Saturday 22 November 2014

Well there's nothing nice about the start of Winter when you are trying to build a house. It's cold and miserable. Boy I really wish I could have started this project in May. Oh well you just have to live with it. At least the house is enclosed. There is still outside work however I can also work indoors if the weather is to miserable to work outside. I'm just thankful we did not get what the people got living in the South half of Buffalo and south of there. 2metres of snow in 2 days is way too much, and now they will have rain to compound things. So on with the story.

Last week Sunday I had the heater going again trying to get as much heat into the stone and concrete walls as possible. I also spent some time working in the Living room area caulking the wall seams prior to building my false wall for wainscotting. As mentioned I refuse to cut into the SIP panels so I needed to build strategically placed false walls for some plumbing but mostly for future electrical work. I also built the false walls in the spare bedroom as well. The first picture shows the start of the wainscotting in the living room and the second shows the two pillars either side of the headboard area in the spare bedroom.


On Monday it was back to heating the basement. I also spent some time finishing the wainscotting wall in the living room. To make things legal I also built an attic access in the master bedroom closet. I had to make a trip back to the house to find out the dimensions of the dining room Hutch to ensure I had the correct space between where I stopped and started the wainscotting wall in the Dining room. I also installed the last poll for the roof support on the back deck. I could not install it previously since we needed to pour the concrete for the cold cellar lid up which the pole would sit. Here is a picture showing the final wainscotting wall with the china hutch gap. As well I have a picture showing the last pole installed. The third picture is there just to show what the house looked like after our little snowfall.


Tuesday was the big basement day. I came in an hour early to flash up the heater for an hour prior to the concrete boys coming. Unfortunately the heater was diesel based so could not be left running while they were down there. I stank to high heaven but after having the windows opened for a few minutes the fumes were evacuated. The heat stayed in the stone and once the concrete was being poured it heated up quite a bit. 54$ worth of diesel was burned over the previous 4 days to get and keep the basement warm for this job. Within a few hours all the concrete was poured and 3 gentleman remained to hand trowel the floor as it started curing. The finished the second hand troweling around 5-6pm so they spent the better part of 12hrs on the job. However we have a very nice smooth floor. While they were working on this I built 8 small boxes that will be mounted in the ceiling into which my LED ceiling lights will mount. Although the lights are IC lights we don't know if that means you can cover them with spray foam. I plan on having 2inches of spray foam installed all over the ceiling prior to having blown in insulation installed for a total R value of 50. Therefore I built these boxes to allow the spray foam to cover the boxes and then the light gets installed in the box when we install all the fixtures. There are 4 boxes in the living room area and there will be four boxes in the kitchen. I also think I might make 2 more boxes and buy two more lights for over the office desk area as well. First picture shows the concrete truck with it's conveyor over the window well where they attached a chute to direct the concrete into the basement. Second picture shows this chute and the boys waiting to start work. Third picture shows the start of the concrete pour in the cold cellar. Fourth picture shows the floor about halfway through the job. Since they needed two truckloads the fifth picture shows how they accomplished this. Instead of moving the first truck they just dumped the second truck into the first truck and continued the job. 


Wednesday was a little more relaxed. I took some time to work on prepping the soffit area for the soffits. I also spent some time on the garage trimming out the two garage doors with brown trim to match the future soffit and facia as well as the house windows. I also with the help of the Brother in law brought over the two shower assemblies that have been stored in Mom's garage for the last month or so. Her garage is finally starting to be emptied of all the stuff I've been buying in advance. Here are two pictures showing the work on the soffits and the two garage doors.


On Thursday we finished working on the garage by building a false wall in the second garage door opening and building an attic access. The garage is now ready for a framing inspection which will happen next week Monday. Now you may ask why fill in the garage door. It was always my intention to only have one operational garage door as I plan to use the garage as a work shop. However maybe in the future I will use the garage less as a shop and more as a garage. So I planned ahead by framing in the second doorway but just filling it in with a fake wall that can be removed at any later date. I also started work on building the stairway to the basement. First job was to build a part of the exterior basement wall. Then I would need to build a platform on which the stairs would rest. This platform would be 14in high to allow two 7in steps into both the front and rear part of the basement. Let me digress for a few minutes. As a kid I would quite often go along with my Dad to the construction site. Dad was a finish carpenter working for a couple of contractors. In those days the finish carpenter usually built any stairs that were required in the houses. He also at one time even built the kitchen and bathroom cabinetry although by the time I went to work with him that was ending. However I always remember Dad making stair and helping him with them. They would always start with a pair of Fir 2by12's for the stringers. Regular 2by10's would be used for threads and some 1by would be used for the risers. Once Dad calculated what the rise and run would need to be to fit in with code he would draw this out on the stringer and then dado cut out the grooves for the threads and the risers. Then we would install one thread and riser at top and bottom and fit the assembly into the location they were going. If nothing was amiss we would install the remaining threads and risers. Somehow I never seem to remember any staircase being amiss. I like to think that all this rubbed off on me. For although I did not dado out grooves, I still went through the entire process of calculating rise and run. Since I knew that I wanted a 9in run to accommodate the the 2by10's I would be using as threads. It just left me with calculating the rise. In the end it was 13 rises of 7-1/4in that was needed to get me from the main floor to the platform. When I drew this on the stringer and cut it out I fit like a glove. So we used this stringer as a pattern for the other two stringers. First two pictures show the wall and platform construction. Third picture shows the stringer in place after the top and bottom cuts had been made. Once installed a level on thread line was bang on level so removed it and cut out all the notches and called it a day.


Friday we continued work on the stairway. I first built the northerly wall of the staircase area. This one fell basically right underneath the support beam. Or at least it was supposed to. Turns out the beam or the first stud under the beam was out by 3/8in therefore I will need to run some 3/8in thick plywood pieces as filler stock so that the drywall ends up being a smooth wall. No big issue. Now the second wall was a little more complicated. This wall was going up into the main floor and would be the back wall of the office area. As well I knew I would have some area upstairs above the stairwell I could use as storage however needed to see how this was all going to fit together. First thing we calculated was that I could have a 4ft pad over the platform area on the main floor as storage area and still have the headroom I required. Secondly after thinking about it I decided to have a stepped wall from the head of the staircase to the storage area behind my desk instead of a straight wall. So first we show the back wall and the start of the second wall. Next picture shows the platform joists made out of 2by8's, we're only spanning 4ft. Third picture shows the start of the wall behind the office space.


So today we went in and continued working on the office wall and the walls of the storage area. We also installed the three stringers and then cut and installed the threads and risers. We made the threads out of 2by10's and used the leftover flooring pieces as riser material. A 178 screw later the main staircase is built. I still need to make the two steps off the platform but those can be done next week. For now we have easy access into the basement. Although the main part is done I still need to work on the storage area. I now plan to have a built in cabinet from half of this area for the master bathroom as well the other half will be bookshelf area for the office area. First picture shows the completed staircase and the second picture shows the office wall with its 2ft steps. First level is 4ft second is 6ft and the third is 8ft. The storage area on the left still needs work.


Well if everything stays nice for tomorrow I hope to be able to finish shingling the garage roof. So please think nice warm sunny thoughts for me. So until next time have a great week. Oh and my condolences if you live south of Buffalo in the snowbelt area.

Harold


Saturday 15 November 2014

Snow it's a "four" letter word and I don't mean literally. Yes winter has started coming we had a few days of light snow here that caused some roofing hassles and with snow comes cold temperatures which caused some hassles for pouring concrete as well. Needless to say it is lousy when working in cold, damp weather conditions. However there was good news this week on the progress front.

On Sunday the weather was good enough that I could get up on the rear of the garage and install the Ice and water shield as well as the GAF roof decking material. This essentially made the garage waterproof from rain so that they could pour the concrete in there. As well I placed some more water proofing material over the rim joist area and onto the brick lintel I installed by the side deck. Lastly I cleaned out the old framing I had in the cold cellar and installed new blocking that would support the steel decking that would hold the concrete for the cold storage slab. These 4by4's were installed three feet on centre such that they would be under the seams of the steel decking. Here are some pictures. First one shows the rear of the garage with the weatherproofing as well as the starter row of shingles. The second picture shows the bracing as well as the waterproofing for the cold storage slab. Lastly we see the weatherproofing by the side door.


On Monday I managed to install a cycle or roof shingles(4rows) before I had to stop. I stopped since the roofers showed up to start on the house roof and they needed electricity from my generator to run their compressor. Since I was not sure if the generator would handle two compressors kicking in at the same time I stopped roofing. Therefore I decided it was time to build the framework for the side porch. Once this was done I started to waterproof the Rim joist area with Blueskin product. I managed to do about 1/2 of the house. I also took delivery of the windows that day. Here we see the fruits of my labour. First picture shows roof shingles and then we see the deck framework with the pallets for stairs. Then the last picture shows the rim joist waterproofing with the Tuck tape covering the seam.


Tuesday being Remembrance Day in Canada or Veterans day in the US was a beautiful sunny day. I wish the entire week had been this weather. As it was I managed to get another cycle of roofing done before the roofers came and started their work. With the Brother in law's help we installed 4 windows under the two porch roofs front and back. I also waterproofed the front rim joist area and started on the west wall. Lastly Cotton Inc came and installed the gravel in the Garage and back shed in preparation for concrete. An other thing that happened was we had our plumbing inspection for the rough in plumbing and passed. This means the basement is capable of having the concrete floor installed. First picture shows the front windows installed as well as the weather proofing. In the next three pictures we can see the Brother in law holding the window in place while I am on the inside shiming it level and plumb. I would then go outside and put a few nails in to hold it in place temporarily. In the last picture we see them slinging gravel into the garage.


On Wednesday we installed five more windows. Before installing these windows I installed some Blueskin waterproofing membrane around the window openings as these windows are more exposed to the weather than the ones under the porch roof. I also started working on the Soffit and Eave support items on the house and garage. This also included nailing in a 6inch strip of OSB along the end of the Trusses to prevent the insulation from going into the soffit area, The first picture shows the strip of OSB above the Tyvek paper and then you can also see the 2by2 that I nailed up level with the bottom of the soffit where the actual vented soffit will be secured to. The second picture shows this on the garage as well as the 2by2 going up the Gable end for the eave soffit.


Ok Thursday was just not nice. Snow arrived and came down off and on most of the day making life miserable for the roofers. They initially hoped to be done today however weather and a screwed up order worked against them. Turns out the manufacturer placed 9 bundles of the wrong colour on the pallet before it left the factory. So they were short a few bundles. As well with the slipperiness of the melting snow on the roof they called it a day early and would come back on Friday to finish, I took the morning to return 4 wall panels back to Thermapan in Fort Erie. I will be glad to get this money back as I can then spend it on insulation for the Garage. I also went into Penner Lumber and ordered my front door from them. This is an Ostaco door with three point latching system. We hope the door will be delivered in the second or third week of December before they go on vacation for Christmas.
There were no pictures taken today of any note.

Friday was the big day. First the company came in and poured the concrete in the garage, in the shed and on the cold cellar lid. The boys had to work quickly since with the colder weather there were additives and warm water that speeded up the setting of the concrete. However they did yeoman's work and got it all laid done and smoothed out without losing any of it. Secondly the roofers came and finished the roof. The house would now be weather tight with the exception of three doors and one window. However these would be installed on Saturday, well sorta off. We packed it in a little early so that I could go to town to pick up some supplies as well as rent a heater for the basement. First three pictures shows them pouring concrete in the garage and on the cold cellar roof. The fourth picture shows the roofer installing the ridge vent. Last picture shows a completed roof.


On Saturday I brought the heater to the house and using a chain hoist lowered it down to the basement. This is a 175,000BTU Torpedo heater burning either diesel or kerosene. Within an hour the basement was toasty warm. However you had to be careful about the exhaust fumes so we did not work down there and we kept a window open slightly to help ventilate the basement. As well Cotton Inc came down and cut in the slots in the garage floor. Later in the morning the Brother in law came and we installed the last window. We also installed the doors, the patio door to the deck, the door to the side porch, and a sheet of plywood over the front door opening to keep people out until the door comes in. As well I spent some time digging a small trench over where I had buried the conduit for electricity as I needed to bury a second warning tape. The first on I buried 6in above the conduit. Turns out I needed to bury this tape 6in below grade level. Oh well ground was still not frozen so not to difficult to dig. First two pictures show the patio door and last window installed as well as the side door installed. The third picture shows the warning taped in the ground before burying and the last picture shows the house all buttoned up for the first time today Nov 15th.


Well that's were we stand for now. For the next few days I'll keep heating the basement so when they pour on Tuesday the gravel is at the required temp. I'll also try and get up on the garage roof to finish the shingles. Lastly I'll work on the garage so that I can get the framing inspection done so that I can start insulating it. Till next week stay warm and THINK SUNSHINE.

Harold