Last week Sunday I had the heater going again trying to get as much heat into the stone and concrete walls as possible. I also spent some time working in the Living room area caulking the wall seams prior to building my false wall for wainscotting. As mentioned I refuse to cut into the SIP panels so I needed to build strategically placed false walls for some plumbing but mostly for future electrical work. I also built the false walls in the spare bedroom as well. The first picture shows the start of the wainscotting in the living room and the second shows the two pillars either side of the headboard area in the spare bedroom.


On Monday it was back to heating the basement. I also spent some time finishing the wainscotting wall in the living room. To make things legal I also built an attic access in the master bedroom closet. I had to make a trip back to the house to find out the dimensions of the dining room Hutch to ensure I had the correct space between where I stopped and started the wainscotting wall in the Dining room. I also installed the last poll for the roof support on the back deck. I could not install it previously since we needed to pour the concrete for the cold cellar lid up which the pole would sit. Here is a picture showing the final wainscotting wall with the china hutch gap. As well I have a picture showing the last pole installed. The third picture is there just to show what the house looked like after our little snowfall.


Tuesday was the big basement day. I came in an hour early to flash up the heater for an hour prior to the concrete boys coming. Unfortunately the heater was diesel based so could not be left running while they were down there. I stank to high heaven but after having the windows opened for a few minutes the fumes were evacuated. The heat stayed in the stone and once the concrete was being poured it heated up quite a bit. 54$ worth of diesel was burned over the previous 4 days to get and keep the basement warm for this job. Within a few hours all the concrete was poured and 3 gentleman remained to hand trowel the floor as it started curing. The finished the second hand troweling around 5-6pm so they spent the better part of 12hrs on the job. However we have a very nice smooth floor. While they were working on this I built 8 small boxes that will be mounted in the ceiling into which my LED ceiling lights will mount. Although the lights are IC lights we don't know if that means you can cover them with spray foam. I plan on having 2inches of spray foam installed all over the ceiling prior to having blown in insulation installed for a total R value of 50. Therefore I built these boxes to allow the spray foam to cover the boxes and then the light gets installed in the box when we install all the fixtures. There are 4 boxes in the living room area and there will be four boxes in the kitchen. I also think I might make 2 more boxes and buy two more lights for over the office desk area as well. First picture shows the concrete truck with it's conveyor over the window well where they attached a chute to direct the concrete into the basement. Second picture shows this chute and the boys waiting to start work. Third picture shows the start of the concrete pour in the cold cellar. Fourth picture shows the floor about halfway through the job. Since they needed two truckloads the fifth picture shows how they accomplished this. Instead of moving the first truck they just dumped the second truck into the first truck and continued the job.


Wednesday was a little more relaxed. I took some time to work on prepping the soffit area for the soffits. I also spent some time on the garage trimming out the two garage doors with brown trim to match the future soffit and facia as well as the house windows. I also with the help of the Brother in law brought over the two shower assemblies that have been stored in Mom's garage for the last month or so. Her garage is finally starting to be emptied of all the stuff I've been buying in advance. Here are two pictures showing the work on the soffits and the two garage doors.


On Thursday we finished working on the garage by building a false wall in the second garage door opening and building an attic access. The garage is now ready for a framing inspection which will happen next week Monday. Now you may ask why fill in the garage door. It was always my intention to only have one operational garage door as I plan to use the garage as a work shop. However maybe in the future I will use the garage less as a shop and more as a garage. So I planned ahead by framing in the second doorway but just filling it in with a fake wall that can be removed at any later date. I also started work on building the stairway to the basement. First job was to build a part of the exterior basement wall. Then I would need to build a platform on which the stairs would rest. This platform would be 14in high to allow two 7in steps into both the front and rear part of the basement. Let me digress for a few minutes. As a kid I would quite often go along with my Dad to the construction site. Dad was a finish carpenter working for a couple of contractors. In those days the finish carpenter usually built any stairs that were required in the houses. He also at one time even built the kitchen and bathroom cabinetry although by the time I went to work with him that was ending. However I always remember Dad making stair and helping him with them. They would always start with a pair of Fir 2by12's for the stringers. Regular 2by10's would be used for threads and some 1by would be used for the risers. Once Dad calculated what the rise and run would need to be to fit in with code he would draw this out on the stringer and then dado cut out the grooves for the threads and the risers. Then we would install one thread and riser at top and bottom and fit the assembly into the location they were going. If nothing was amiss we would install the remaining threads and risers. Somehow I never seem to remember any staircase being amiss. I like to think that all this rubbed off on me. For although I did not dado out grooves, I still went through the entire process of calculating rise and run. Since I knew that I wanted a 9in run to accommodate the the 2by10's I would be using as threads. It just left me with calculating the rise. In the end it was 13 rises of 7-1/4in that was needed to get me from the main floor to the platform. When I drew this on the stringer and cut it out I fit like a glove. So we used this stringer as a pattern for the other two stringers. First two pictures show the wall and platform construction. Third picture shows the stringer in place after the top and bottom cuts had been made. Once installed a level on thread line was bang on level so removed it and cut out all the notches and called it a day.


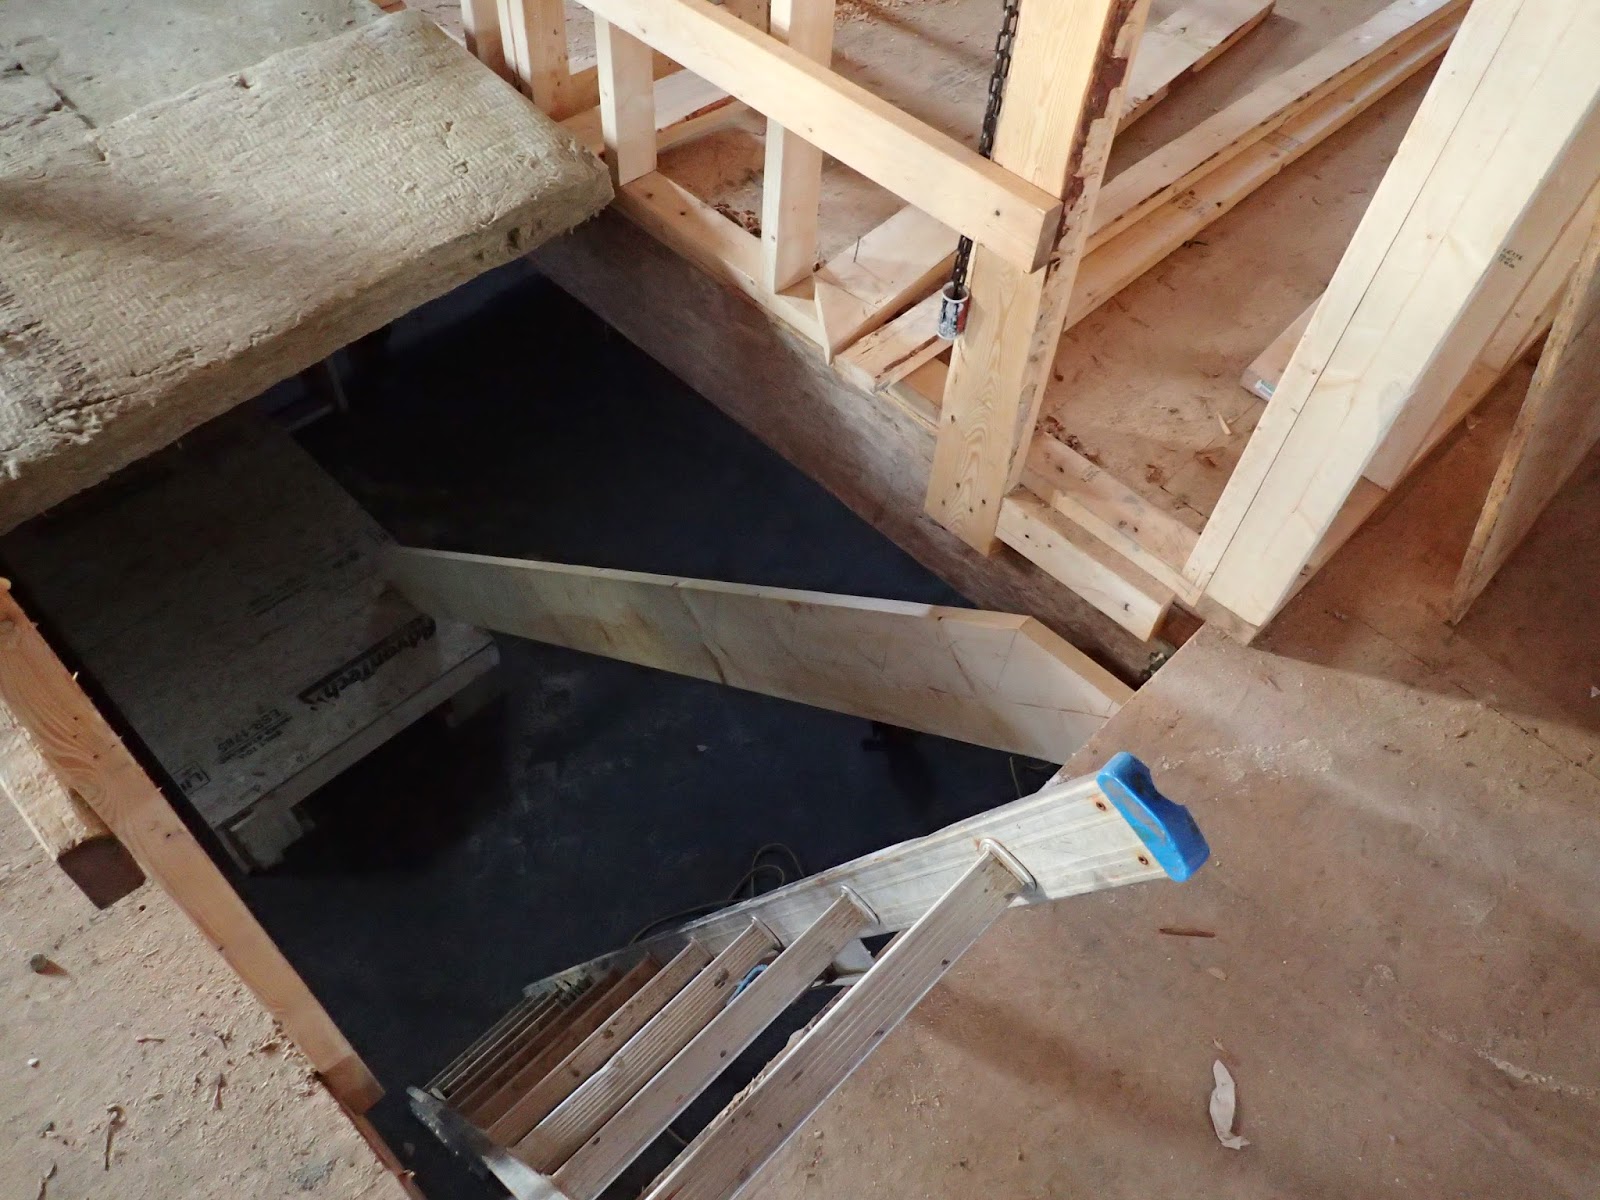
Friday we continued work on the stairway. I first built the northerly wall of the staircase area. This one fell basically right underneath the support beam. Or at least it was supposed to. Turns out the beam or the first stud under the beam was out by 3/8in therefore I will need to run some 3/8in thick plywood pieces as filler stock so that the drywall ends up being a smooth wall. No big issue. Now the second wall was a little more complicated. This wall was going up into the main floor and would be the back wall of the office area. As well I knew I would have some area upstairs above the stairwell I could use as storage however needed to see how this was all going to fit together. First thing we calculated was that I could have a 4ft pad over the platform area on the main floor as storage area and still have the headroom I required. Secondly after thinking about it I decided to have a stepped wall from the head of the staircase to the storage area behind my desk instead of a straight wall. So first we show the back wall and the start of the second wall. Next picture shows the platform joists made out of 2by8's, we're only spanning 4ft. Third picture shows the start of the wall behind the office space.


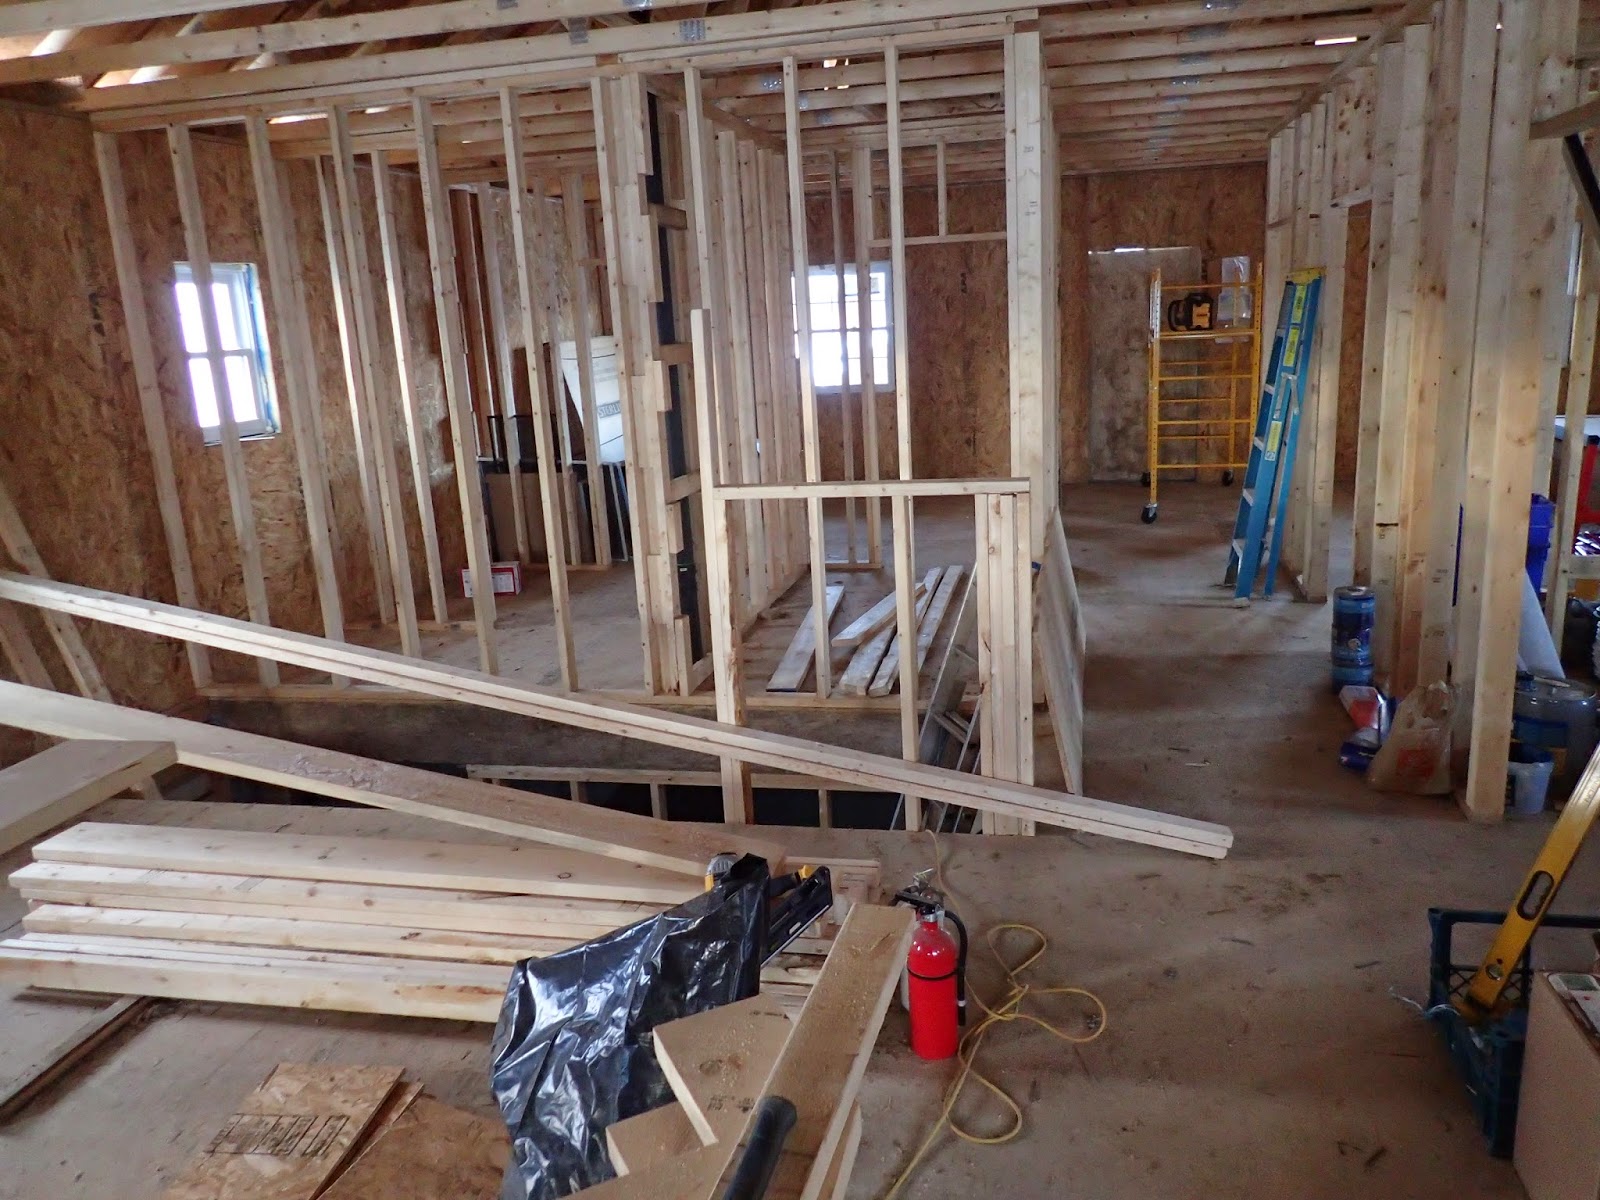
So today we went in and continued working on the office wall and the walls of the storage area. We also installed the three stringers and then cut and installed the threads and risers. We made the threads out of 2by10's and used the leftover flooring pieces as riser material. A 178 screw later the main staircase is built. I still need to make the two steps off the platform but those can be done next week. For now we have easy access into the basement. Although the main part is done I still need to work on the storage area. I now plan to have a built in cabinet from half of this area for the master bathroom as well the other half will be bookshelf area for the office area. First picture shows the completed staircase and the second picture shows the office wall with its 2ft steps. First level is 4ft second is 6ft and the third is 8ft. The storage area on the left still needs work.


Well if everything stays nice for tomorrow I hope to be able to finish shingling the garage roof. So please think nice warm sunny thoughts for me. So until next time have a great week. Oh and my condolences if you live south of Buffalo in the snowbelt area.
Harold
Cost plays a major role when selecting bulk packaging solutions. The PP woven bags price in India depends on factors like GSM, size, lamination, and printing. Despite price variations, PP woven bags remain a highly economical option due to their durability and reusability. They are widely used across agriculture, cement, and fertilizer sectors, offering excellent value for long-term packaging needs.
ReplyDelete