Saturday, 31 October 2015

Well Halloween has arrived I guess Christmas is next

Well not a bad week not an exceptional one either. Worked 4 days this week and will be working 4 days next week as well. However we did get some work done and I believe I'm on the downward slope to completion. So on with the story to date.
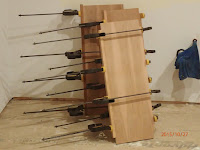
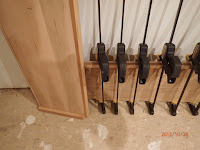
On Sunday we did our final coat of paint on the trim we installed last week. As well I decided to quickly make up a few shelves for the laundry room upper cupboards and gave them their first coat of paint. Lastly we touched up the ceiling paint above the shower in the spare bathroom as it had been slightly damaged during installation of the tiles as mentioned last week. Here is a picture of the three shelves, I might make another three later on we'll see how these three work for storage. All we did was face the front of the plywood shelf and then add a stiffener to the rear.


On Tuesday we painted the first coat in the spare bathroom. Now a little background here. I basically told my Mom and my Sister that they would have to choose the colours for the spare bathroom and bedroom. I fully expect that my Mom will most likely use it occasionally when she comes to visit instead of driving home in the dark. Therefore she might as well have a hand in the colours for that room. Well I knew they would be different and as I started painting the bathroom I wondered if I might have made a bad decision. While the colour has grown on me it would not have been my first choice. Similar to the master bedroom the spare bedroom will have the recessed headboard area painted with a different colour than the rest of the room. As it is the headboard area and the bathroom will have the same colour. Both colours are a based on a green shade. The headboard area will be darker than the remainder of the room. After giving the bathroom it's first coat I've realized that the cabinets and the floor will need to be a light colour to offset the darkness of the walls. Once this was done we took some time to cut out the sides and interior walls of the upper kitchen cabinets. Once this was done we cut down some cherry to be used a edging on the cherry plywood panels. So here are a couple of pictures showing the paint in the bathroom and bedroom. Then the last picture shows the upper cabinet panels.


On Wednesday we gave the rooms their second coat of paint and then continued working on the upper cabinets. This included adding a cleat to the bottom of the panels that will support the bottom shelf of the cabinet. We also had to carefully cut two pieces of this edging on an angle as there will be an angled corner cabinet at the one end by the exterior wall. Unfortunately we screwed up cutting the angle so we had to trim off the edging and glue on a second piece after we cut the correct angle. For those interested the edging is being installed using #10 biscuits and a biscuit jointer. Here you can see three panels with clamps up drying and in the second picture you can see one panel with the bottom cleat as well as the corrected panel drying after its second edge was installed.


Well that was about all we did as we then worked Thursday, Friday and today. I did manage to spend some time Thursday night drilling holes for the shelves in the units. I got a lucky break on this. I forgot I owned a drilling guide for doing these holes. After looking on the Lee Valley website I realized that I owned one of their shelf drilling jigs. After digging through the boxes I found the drilling jig guide but now I needed to find the drill bit bushings. Again I had over twenty containers to look through. Luckily in the third container I found the bushings and was able to set up a method of drilling the holes. Here's a picture showing the one guide I used with some clamps holding it in place. I've left the drill in the hole and the jig while I took the picture. Only took about 30 min to set up and drill all the holes for the upper cabinets. I also only drilled holes from the green tape to the left clamp. So I do not have a complete row of holes all the way down the panel, just in the middle area where I expect the shelves to sit.


 So hopefully we'll have a chance to maybe start the building of these cabinets tomorrow. After that we'll work on them on Tuesday and Wednesday along with painting the two coats of paint in the bedroom.  Then it's  back to work for the rest of the week. See you next week and don't forget there's time change for most of us tonight(Saturday the 31st)

Harold


Saturday, 24 October 2015

Living room is looking good

Well we had a little change of plans. Instead of starting on the kitchen cabinets this week decided to finish the trim in the living room/dining room area. Oh well just means we start the cabinets at a later date.
So last Sunday we  gave the wainscoting it's 3rd coat of varathane over the whole area. Then on Monday after work we just varathaned the top rail of the wainscoting. This will probably get one more coat before we finish the trim on it.

On Tuesday we spent some time in the morning painting up the majority of the trim that will be required in the Living room, Dining room and Kitchen area. As mentioned before because of the way I am building the house and living in it I paint the trim at least twice before installing it and then once the nail holes are filled in and smoothed over I carefully go over most of the trim with a third coat of paint. After going to a noon hour appointment came home and finished installing the trim for the Master bathroom and closet area. As you'll see in the photos there are no doors however you will notice a closet rod in the doorway area. I will be installing a curtain as door way instead of solid door. I expect that most of the time the curtain will remain wide open. So here are two photos showing the trim painted and the doorways trimmed.


On Wednesday I gave the trim it's second coat of paint and then proceeded to mix up the grout I was going to use to grout the tiles above the shower in the spare bathroom. Unfortunately I probably added about 30ml of water too much. It took over 45 min for the grout to set-up enough to allow me to spread it out on the vertical shower walls. Once installed in the tile slots it set up normally. By the time I had spread out all my grout it was time to start wiping down the tiles where I had started installing the grout. After an initial cleaning we waited an hour and then cleaned it once more. Then I gave it a final wipedown about 3hrs later. I still need to seal the grout but it looks good. I did learn one thing though. There is green painters tape and blue painters tape here. I was always told the blue stuff was the better product and had lower adhesion capability. Well I use it and the green tape to tape paper up on the ceiling and side walls to protect the area from grout. Well the blue tape peeled paint away and the green did not. So we now need to touch up the ceiling before we paint the walls in the bathroom. Anyway here is a photo showing the completed tile area in the shower stall. It actually turned out quite well and I actually like this tile better than the tile I used in my Master bathroom. However I am not going to change it.


Next day we worked on the house was today, Saturday. Today we spent time working on trimming out the small bookcase and all the windows in the Living room, dining room and kitchen area. Area as well we installed the teak trim on the top of the wainscoting. It actually went really nicely and all that it needs now is the final coat of paint over the trim to blend in the nail holes after being filled with wood filler. Here are some shots showing the trim work as well as a close up of the teak trim.


So as of now will spend some time on Sunday painting the bathroom ceiling and then the trim. Once that is done will cleanup the bath and bedroom in preparation for painting the walls. As well I'll make up my materials list and start work on the upper cabinets for the kitchen area. So until next week have a great time and be careful next week Saturday with all the kids walking around for trick or treat on Halloween.

Harold


Saturday, 17 October 2015

Well we're back to work so the process slows down.

Well went back to work this week after two thanksgiving dinners. Because of all this the amount of work down went down however the result is in my mind astounding.

So on Sunday we prepped all the teak pieces for the top rail of the wainscoting. Because of the length of some of the pieces we needed to joint two boards for two sides. As well we would need to joint the boards in the corners. To do this we used biscuits. As we went along and dry fitted the pieces I was quite happy to see that only one corner needed to have the angle cut adjusted slightly to allow the two pieces to fit together snugly. After this was done went over to the Sister's place for Thanksgiving Turkey with Mom and the Sister's kids and inlaws.

On Monday fully installed the top shelf of the Wainscoting and also managed to give it it's first coat of varathane. Once complete the top rail will have between 5-6 coats of varathane and the plywood body will have 3 coats. Here's a picture showing the top rail installed with its first coat of Varathane.


Once this was done the Brother showed up for a tour with the clan. After their stamp of approval we went of to Mom's house for a family supper. 

On Tuesday I continued working on the wainscoting by starting to install the trim that would frame out the panels in the work. We cut up all the teak we had and once down calculated how much more we would need to buy to finish the job. As well I needed to install some "fill out" strips on the patio door to flush out the jambs to allow me to install the casing at a later date. As well this strip had to be installed prior to the last piece of teak was installed that would butt up to this fill out strip. 

On Wednesday we finished of the trim work and gave the wainscoting its first coat of varathane.
Here's a photo showing the completed work along with its first coat of Varathane.


The small strips on the saw horses are the pieces that will be used to cover the flooring joint by the baseboard as well as the small gap along the wall where the top rail is installed. This top portion will go in once the window casing is installed and the bottom portion once the Bamboo flooring has been installed. I hope to order this flooring within the next week or so.

On Thursday we went back to work so all we did once we got home was sand the wainscoting and give it its second coat of varathane. 

On Friday went out for dinner so no work and to be honest after work on Saturday I just did not have the energy to do more than sand the wood slightly and get it ready for its third coat of varathane. 

So next week I plan to finish varathaning the wood and start to work on the kitchen cabinets. As well if there's some spare time I might also try and finish the grouting of the bathroom tiling and start painting the spare bathroom and bedroom. So until next week keep warm because I hear that snow has reared its ugly head in some areas near me. I really wish we could keep the temperature a nice
21degrees C  for 364 days a year and then just one day of snow for the kids on Christmas. Oh well I can dream can't I?

See you all next week.

Harold


Saturday, 10 October 2015

Working with Teak can be real expensive

Well it's been an expensive week. Bought a bunch of solid teak wood for the wainscoting and had a solid surface countertop installed in the Laundry room. However at the end of the day it was all worth it. So let's get onto what happened this week.

So on Monday we started work on finishing off one portion of the wainscoting. The top edge will get a 5" piece of teak. Then on top of the plywood will be 1/2" pieces that will form squares and cover the joints of the plywood as well. At the bottom will be a 5" piece of teak as baseboard. Once the floor is installed I'll finish this off with a smaller piece of "quarter round" trim to hide the edge of the flooring. I decided that the lower sill of the four windows that are over the wainscotting will have a teak lower sill and then the rest will just be finger joint pine painted white. So first thing we did was cut out two pieces of teak, one for the top of the wainscoting and a smaller one for the window sill. Since these two pieces are on the same level they needed to be joined together. This was accomplished using a biscuit jointer. While the glue was drying I took the time to start finishing off the top  and sides of the wall alongside the stairwell. This also received a teak treatment. This time the boards were 6.5" wide to accommodate some casing under the edges and still leave a little reveal. The third project was to install some of the leftover teak plywood pieces into the small cubby hole above the staircase that will be a small bookcase and storage area. The layout worked out as the joints were covered by 1by2's that will support two shelves. As I've done for the last few days I occasionally moved a few boxes into the house from the garage. Actually by the end of the day almost all the boxes were moved now we just need to move some of the larger furniture. Here is a picture showing the dividing wall with some teak facing on it and secondly the bookcase cubbyhole with teak installed.


On Tuesday we continued working on various trim pieces. We sanded smooth the top piece for the wainscoting and then proceeded to give it three coats of oil modified water based varathane. I'm really pleased with this product as it is giving the wood a nice colour and it cleans up with water. We also varathaned the teak facing on the dividing wall with three coats as well. 

On Wednesday it was a continuation of working on the trim and painting and varathaning various pieces as well. I usually paint or varathane a lot of the trim before installing it over painted surfaces so that I don't have to worry but getting paint on the wall. Once installed and the holes filled with a suitable material then I come along and very carefully apply one final coat of paint. Nice thing is I don't have to do the edge near the wall since this has two good coats, all I am doing is one final coat to cover the nail holes and the joints. 

On Thursday we installed the casing underneath the teak on the dividing wall as well we installed the majority of the trim over the wainscoting panel on the one small part I was working on. Later in the afternoon the countertop company came in and installed the quartz solid surface countertop for my laundry area. One other thing we finally did was finish off the vent stack for the plumbing. When we installed the plumbing the vent stack came out of the house at a 45deg angle. The reason was to avoid putting holes in the roof. I needed to finish off the soffit and facia before we could finish the vent. During the summer did not want to climb up on the hot roof and possible damage the shingles so waited until it cooled down. Today was a nice cool clear day. So we got out the large ladder and secured it to the house with a tie down strap, then placed a 4by4 on the roof in front of the ladder supports, this supported a second ladder that I laid on the roof. This setup prevented the second ladder from sliding down. I then climbed up the ladders and installed a piece of plastic lumber on the facia and secured the vent to this such that it sticks up above the roof the prerequisite amount. Here are a few pictures showing the completed dividing wall with all the trim installed. As well the small wainscotting area with two coats of varathane. Then the countertop installation and finally the completed vent stack outside.


On Friday we finished tiling the spare shower with the exception of the last row which needed to be specially cut. This was done and then installed on Saturday. We then spent a little more time working on trim and varathing pieces and painting pieces for the two doorways in the master bath and master closet area. As well I had been varathaning a transition piece to cover the gap between the tile and the flooring between bath and bedroom. This is a piece of Black Walnut with walnut stain. Here is a picture showing the tiling of the shower. We added an accent row for looks and so we did not have a small sliver row at the very top.


On Saturday we spent the majority of the day working on cutting and preparing all the teak and pine for the window trim as well as the wainscoting trim for the remainder of the wainscoting. Since Teak is not the cheapest of materials you want to make sure you use the pieces to their maximum efficiency. This meant that I needed to carefully straighten a few boards before cutting them down to size. Since I don't have a long fence to do this with on the tables saw we did it the old fashioned way. I carefully made to marks at each end of the board 1" in. I then stretched a string from mark to mark and then went along and made 1" marks back from the string towards the edge. I then connected the dots and carefully cut this sliver of on the tablesaw by free hand. A little touch up from the belt sander and we had a nice straight edge. Once this was done I could cut out the 5" wide top pieces and laid them out on the wainscoting edge. We then carefully measured up each piece and made the appropriate cuts so they would all join up nicely. As well we cut and marked where the window ledge pieces would go. Once this was done we took all the pieces down made all the slots with the biscuit jointer and then glued up the three sections for the three remaining windows. So here are two pictures first ons showing the string on the board for finding a straight edge and the second one showing the three sections glued up in the clamps drying. If you look closely you can see the 45deg cut on the one board. There are three corners and with the exception of one angle that was 46deg the other two were bang on 45's. No filler required there.


So we have a Thanksgiving dinner at the sister's tomorrow and then the brother is coming down on Monday so we'll have a second dinner then. So I don't expect to much work over the next two days. Thursday I head back to work so I hope by Wednesday evening to have all the wainscoting installed. Then I can varathane it in the evenings after work. Then paint the spare bedroom and bathroom, install flooring and lastly build and install the kitchen. Things are looking up and who knows maybe by the middle of next month I'll have a living room that I can relax in. 

So until next week have a happy Canadian Thanksgiving. 

Harold


Saturday, 3 October 2015

And the work continues

As I said going stir crazy not being able to do much work so relegated to doing small light jobs. But at least we continue to move forward. It's amazing what a nice lawn does. I've had numerous people stop and compliment me on how my new lawn has progressed. I've even been asked what was my secret for such a nice lawn so quickly. Just shows that people are still looking around and not fixating on the road ahead. Unfortunately with the cooler weather and inability to move wheelbarrows of dirt the remaining lawn seeding will happen next year. On a sad note I'm sorry to say Drew your plants have finally started giving up the ghost. I guess they just don't like overnight temps in the low single digits. Anyways onto the story for this week.

On Monday we finished making and installing the doors for the Laundry cabinets. After test fitting them all we removed them and prepared them for a coat of primer. Here are two pictures showing the doors prior to being removed.


On Tuesday we just spent some time priming all the doors on both sides.

On Wednesday we first went to the Doctor's office and had my stitches removed. The Nurse who did the procedure advised me that it looked real good and that starting next week Monday I could start some serious bending and stretching of the and wrist area to get everything back in shape. Based on our conversation it looks good for going back to work on the 15th of October. Thankfully I'll be getting a paycheque again. Later that day we spent some time putting the first coat of Semigloss white on all the doors and drawer fronts. Here's a picture showing some of the doors while they are drying after their coat of paint. Let me tell you they're right, it's painful watching paint dry. Had to leave and visit Mom for a while.


So Thursday morning took a road trip to Exotic Woods in Burlington to pick up my Teak plywood. What a place they had all sorts of wood that I'd never even heard of. If anybody is looking for exotic wood that lives in the Golden Horseshoe area of Lake Ontario that is the place to go. They're on the web Exotic Wood. In the afternoon we installed a few tiles over the shower and the cut out most of the tiles required to start the two side wall and to finish the last row on the back wall. Hopefully this coming week I'll be able to finish this job and then be able to paint the spare bathroom and the spare bedroom. I also decided that I better start moving the rest of my furniture and effects out of the garage and into the house. So I started by moving some boxes into the basement to be stored there until they can get moved to their final resting place as the house gets finished. I want to get everything moved before the weather gets too bad. As well I've noticed that some of the furniture is getting a little mold on it from the humidity of the air in the garage.

On Friday we gave all the doors a second coat of paint on the face of the doors in the morning. Later in the evening we managed to install the lower cabinet doors and the drawers. The upper cabinet doors were not installed in case I decided to put a third coat on them. In between we made a few trips back and forth with the dolly moving boxes. This will take a few days as I am not pushing myself and damaging the incision that is healing nicely.

Today we installed all the teak plywood for the wainscotting. Actually went pretty well with one minor exception. I had all the pieces laid out to match as close as possible to their neighbours. When this was done I had two pieces that were darker than the others. This would not be an issue as I had one small wall that only needed two pieces so that's where they would go. However as I was cutting out the last electrical box opening on the last piece before this short wall I dropped my jigsaw and punched a small hole through the sheathing. So one of the darker pieces now had to be moved into its place. Luckily this was in a corner so that both darker pieces now occupy either side of the corner. It all worked out but there were definitely a few cuss words spoken when the incident occurred. Once this was done we decided to install the upper cabinet doors and then I installed the two taps on the copper stub outs for the laundry sink. When building the base cabinets I knew that the cold pipe was going to be close to the outer cabinet wall. The intent was to install the tap before installing the cabinet. However I went a little to fast building the cabinet and forgot to install the tap. Luckily Lennox makes a small tubing cutter that can cut off a pipe within a 1/2" of the wall. So we bought one and it worked like a charm. Actually much better than the other small cutter I have. Even worked better than the bigger cutter as well. So here are some pictures showing the Wainscotting and the completed cabinets as well as the two taps with the cutter I used on my hand.


Well that's it for now. Next week we have a counter top company coming in to measure up for a counter for the cabinets and I hope to start work on the upper cabinets for the kitchen. I also want to make a decision on the flooring so that I can place the order for this as well. So until next week have a great week and please ask for the heat to be turned back on. Waking up to 9C weather is not the greatest.

All the best

Harold