On Monday I went around and laid some Landscape fabric on top of the drainage gravel to protect the gravel from the dirt that would be backfilled on Tuesday. I also filled in the small shed with dirt in 6inch layers and tamped it down. This will help prepare it for gravel and concrete. I also plan on renting a "Jumping jack" compactor and doing the inside of the garage especially along the walls for the same reason to prepare it for gravel and concrete.
On Tuesday the backfilling was done. The company came down with an operator and two Skidsteers, a large and small one. He started off using the larger one to do all the preliminary work and finished off in the garage and between the piers with the smaller one. He also helped me dig out a small trench from the house to the garage for the cable chases. While backfilling he also cleaned out the driveway so that we could bring in three truckloads of 2" stone for a base fill. When all was said and done we were about one dump truck short of fill. Supposedly when they dig the basement next door they'll move some over. However when they dug this basement they had some issues and the excavator was there longer than planned and they completely forgot about bringing some over to finish my backfilling. I guess we'll need to put the bug in the companies ear about coming down to finish this piece of work. Here are some pictures of the backfilling and the trenching. First two pictures show the backfilling around the front of the house. Third picture shows the house almost complete and we see the start of a problem with the piers which I'll discuss later. Fourth picture shows the garage completed. Fifth and Sixth pictures show the conduit for the power to the garage, the second conduit is for possible solar panel power back to the meter base. The last picture shows the driveway leading up to the garage.


On Friday I went into the basement and removed all the bracing I had installed earlier prior to backfilling. I cleaned all the lumber out of the basement and brought it out onto the new floor. The basement is now ready for the plumber to come in and start his work. While down there I realized I needed to add one more stud under one of the beams. When I had installed the bearing wall I had measured out for the anticipated joist spacing and calculated where I would need to add the extra studs to carry the beam load. Looks like I missed by 1/2inch so I will cut out the one piece of blocking and add another stud to make sure the entire beam load is carried via studs to the footing.
As well on Friday I started working on the walls for the garage. These walls will be 2by6 by 10ft high. I initially laid out both the east and west walls. Unfortunately due weather and visitors did not get quite as far as I planned. So continued work on Saturday in the mist and drizzle. I had really hoped to have the two walls raised on Saturday and then start work on the back wall. However weather again played a factor and I was not comfortable raising the walls with the gusty winds we were having. As well as being miserable due rainy wet conditions. With a little luck the weather will be nicer tomorrow on Sunday and we can raise those two walls. Then with the brother in laws help I will look at laying out the interior walls on the floor so the layout is ready for the Framers who will start raising the exterior walls either Monday or Tuesday. Here are a couple pictures showing the walls under construction and then ready for raising. To keep the weight down I only installed one row of sheathing. I'll install the rest once the walls are up.


While we were waiting for the second and third truck of gravel the delivery driver for my SIP panels called up and asked if he could deliver them Tuesday night as opposed to Wednesday since they were all loaded and ready to go. I said sure come on down. So he showed up an hour later just as the third trucks gravel was being spread out. He unloaded my 6 pallets of wall system and then left for North Bay where the remainder of his load of SIP's were going, Here is a picture showing him unloading a pallet of wall panels.
Now to the problem mentioned earlier. When we were backfilling it became apparent that I would not have my 18inches of exposed concrete on the house as I planned. When the rough grading was done it became apparent that I would end up with only around 8inches of exposed concrete at the back of the house beside the driveway. Because of this the piers were to low and the beam would have been almost sitting on dirt. So I went out and bought some more sono-tube and extended the rear and side porch piers by 10 and 8 inches respectively. The front piers were still okay since the property sloped down towards the front. I believe what happened was what I talked about in an earlier blog when I discussed having to raise the garage because the grading stick was to low. In my ignorance I forgot to talk to the surveyor that if the garage was to low then possibly the house might be as well since they used the same data to determine grade. Thankfully I had specified 18inches of exposed concrete. Had I specified a lower amount I would have had to lay a row of blocks on top of the foundation wall to raise it the same amount as I raised the garage walls. Here are two pictures showing the piers with their 10 and 8inch extensions. This was all done on Wednesday.
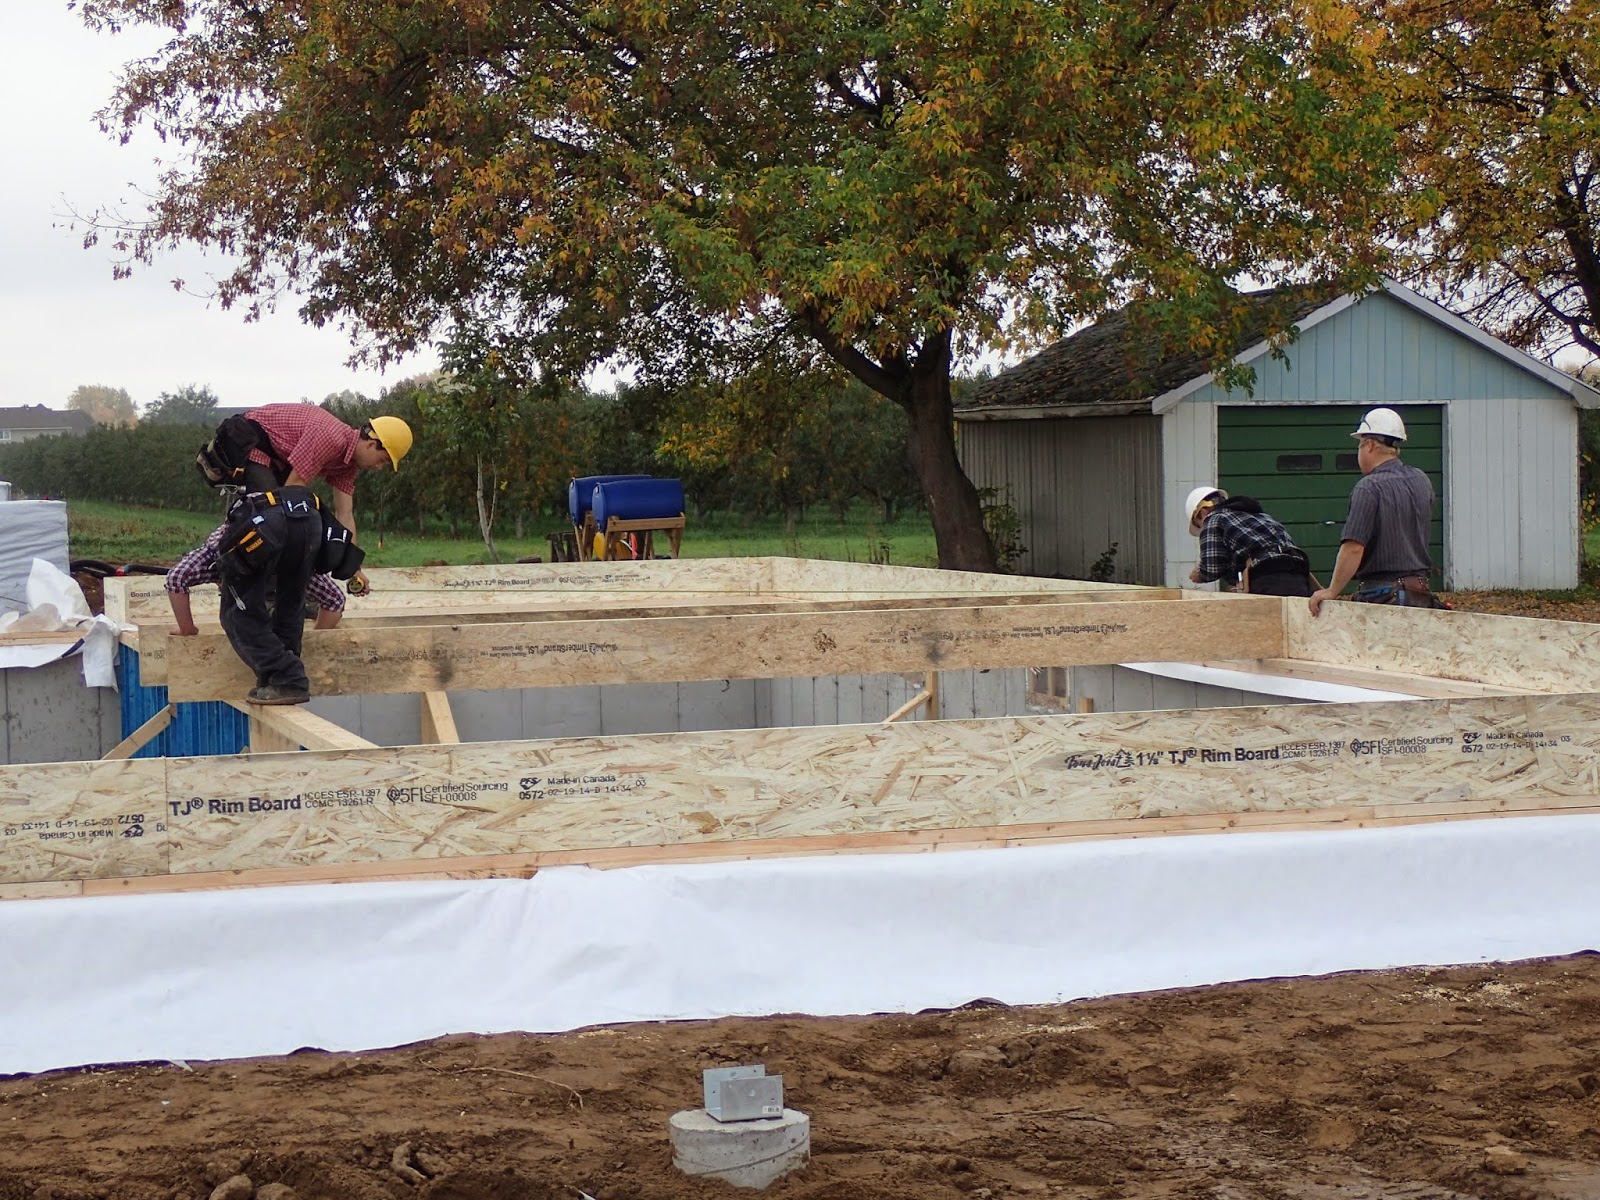
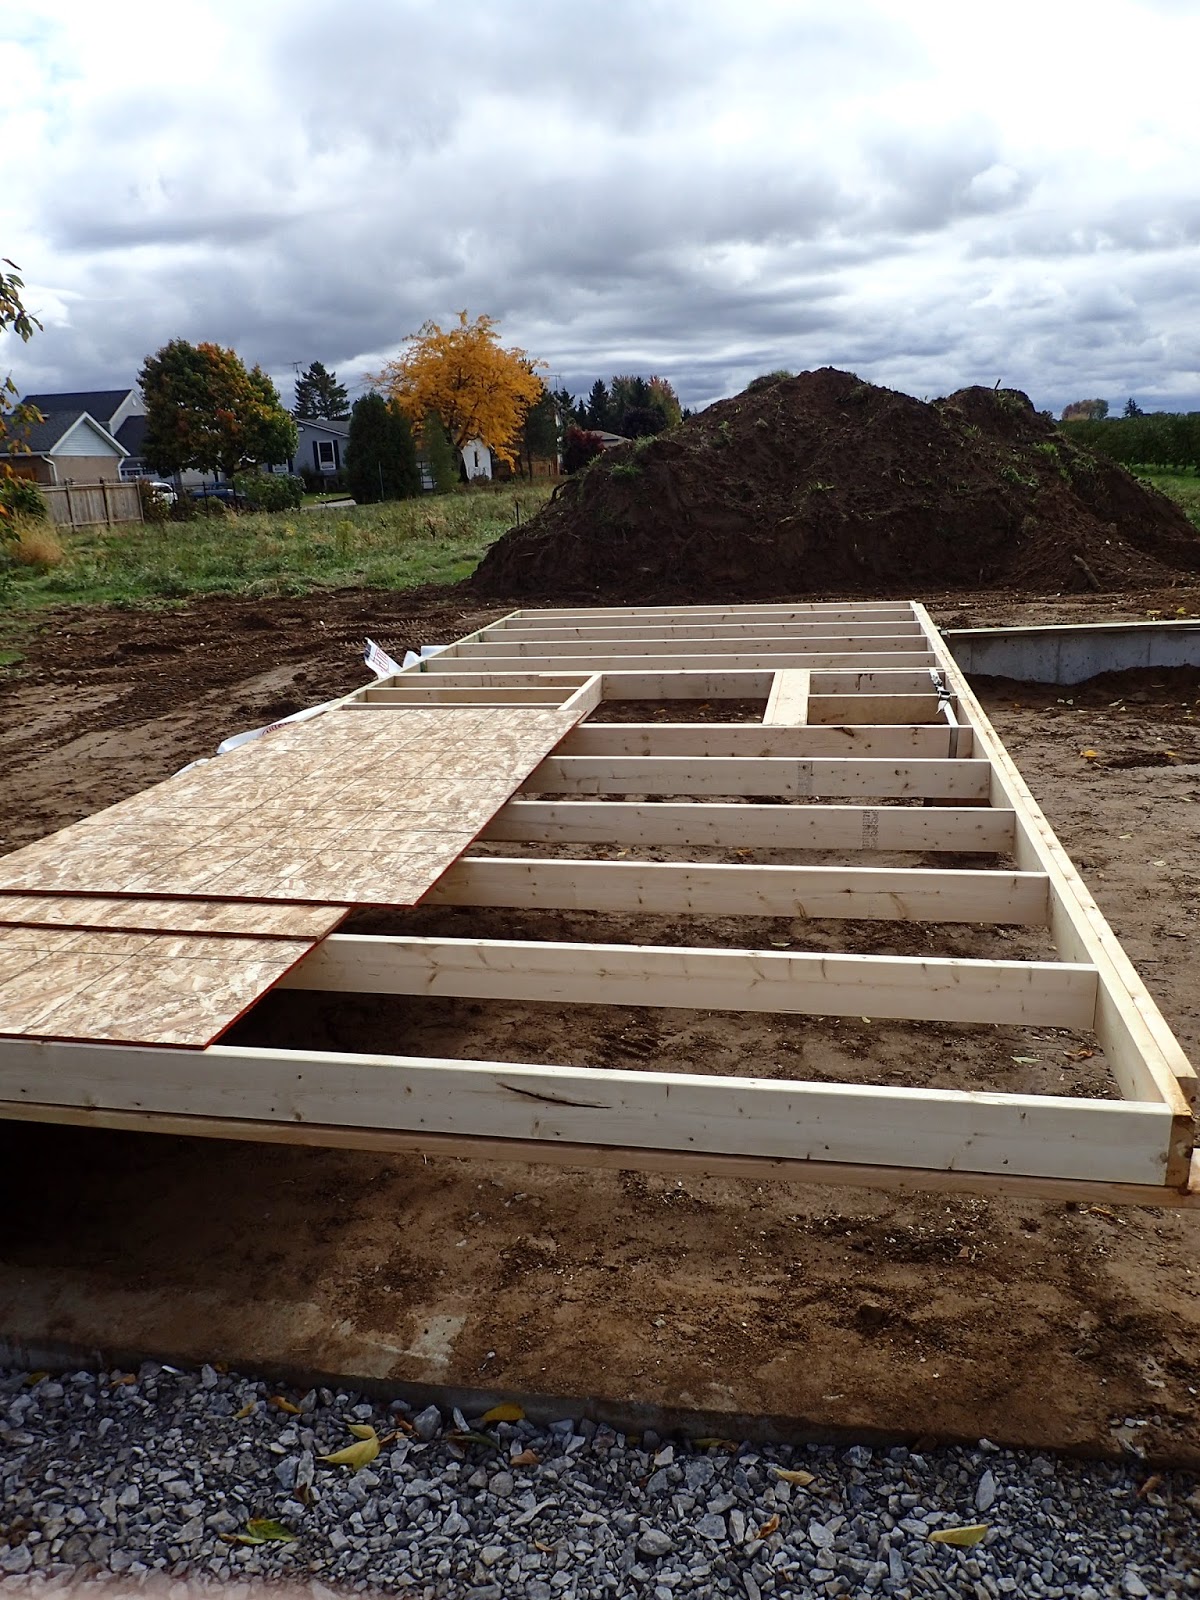
On Thursday the Framers showed up and we installed the floor. They went around and installed sill gasket and tyvek while they installed a double sill plate. By doubling up the sill plate I get an extra 1.5inches of head room in the basement. May not be much but every inch counts when your 6ft5inches tall. Once the sill plates were locked down the joists were laid out and the rim joist was installed. The first pieces of joist installed were the two LVL beams that went either side of the stairwell opening. After this was manhandled into place they started laying out all the I-Beam joists and nailing them down. At the same time short pieces of LVL headers were installed over the 6 window openings and the door into the cold cellar so that there was structure there to hang the floor joists from. Around 3pm we started laying down the Flooring. I'm using a 3/4inch product called Advantech. This is an OSB product that carries a 50yr warranty it is also warranted against water absorption. It has the strength of plywood but at a cheaper cost. Once they got the first row laid down I got involved screwing down the floor allowing the framers to continue the work of installing the flooring. I used a screw gun that uses a screw with a Torx like system. It worked great and I had very few misses or misfires. The screws come in a strip of 50 which is just enough to screw down an entire sheet of flooring. By 5:15 I was screwing the last of the screws into the sheathing. A little cleanup and then home to a dinner with Mom and my sister and husband. This was a auspicious day as it was one year ago that Dad passed away unexpectedly, so we got together to remember him. Here are a few pictures showing the flooring progress. First picture shows the start of sill installation. The second picture shows the beams around the stairwell being placed. Third picture is with the majority of the joists laid out. Fourth picture shows the first row of flooring and the last picture is at the end of day with a completed floor and safety rail around stairwell opening. Thus ended Thursday Oct 16th
As well on Friday I started working on the walls for the garage. These walls will be 2by6 by 10ft high. I initially laid out both the east and west walls. Unfortunately due weather and visitors did not get quite as far as I planned. So continued work on Saturday in the mist and drizzle. I had really hoped to have the two walls raised on Saturday and then start work on the back wall. However weather again played a factor and I was not comfortable raising the walls with the gusty winds we were having. As well as being miserable due rainy wet conditions. With a little luck the weather will be nicer tomorrow on Sunday and we can raise those two walls. Then with the brother in laws help I will look at laying out the interior walls on the floor so the layout is ready for the Framers who will start raising the exterior walls either Monday or Tuesday. Here are a couple pictures showing the walls under construction and then ready for raising. To keep the weight down I only installed one row of sheathing. I'll install the rest once the walls are up.
Well as Porky the Pig used to say "That's all folks". We'll see you again next week same Bat station same Bat Channel.
Harold
No comments:
Post a Comment