Friday, 1 July 2016

Happy Canada Day

Well it's the First of July and for us here in Canada it is Canada Day. No work lots of things to do around town and Fireworks this evening. So I thought it was a good time to update you on what has been going on around here. One good thing is that as of now, knock on wood, all my appliances have been repaired/replaced and they all seem to be working smoothly.

Ok onto the house work. At the beginning of the month I spent some time installing some Casing around the interior door frames that were installed last month. Since I was short some trim I then picked up what I was short as well as door stop material and spent some time painting these pieces. Somehow I never got around to installing it yet so I guess that is still to come. I then started work on installing the trim on the front and rear deck. This is basically more of the rough cut Fir that I am using to cover up the beams. Here are some pictures of the front and back decks. I've cut some small strips of 3/4" by 3/4" Fir from the leftover and will cover the cracks in the corners at a later date.


Once that was done spent a little time forming up a small pad for in front of the man door into the garage and poured some concrete. Here is a picture of this job.


Then in the middle of the month my Brother and his family came down and we cleaned off the old shingles from Mom's garage and reshingled it. If you want to see a short video on this you can check out this link  on my Brothers Youtube Channel

The next thing we did on the house was to continue working on the rear deck railing. So off to the local lumber yard and pickup some clear cedar lumber. Let me tell you it looks great but it is not cheap. The railing is basically two 2by4's between the posts with one 2by6 on the flat on the top 2by4. We then screw square balusters to the 2by4 with 3.5inches between balusters. The code here states that for any deck more than 24"above the surrounding area must be railed and max spacing between balusters is 100mm or appox 4". Here are some photo's showing the deck railings as well as the stair railings. The rest of the railing will be built in July so that it is on the next months billing cycle.


 Next we took the time to build a small fence just beside my Air Conditioner. This will do two things, one baffle the noise a little towards the neighbour and also make it a little less visible from the street. This was just two 4by4 placed in the ground with dirt tamped around them and then some cedar deck boards on either side of a pair of 2by4's between these posts. This was then topped with a nice piece of cedar 2by6 on the flat. Here is a photo of the fence rail.


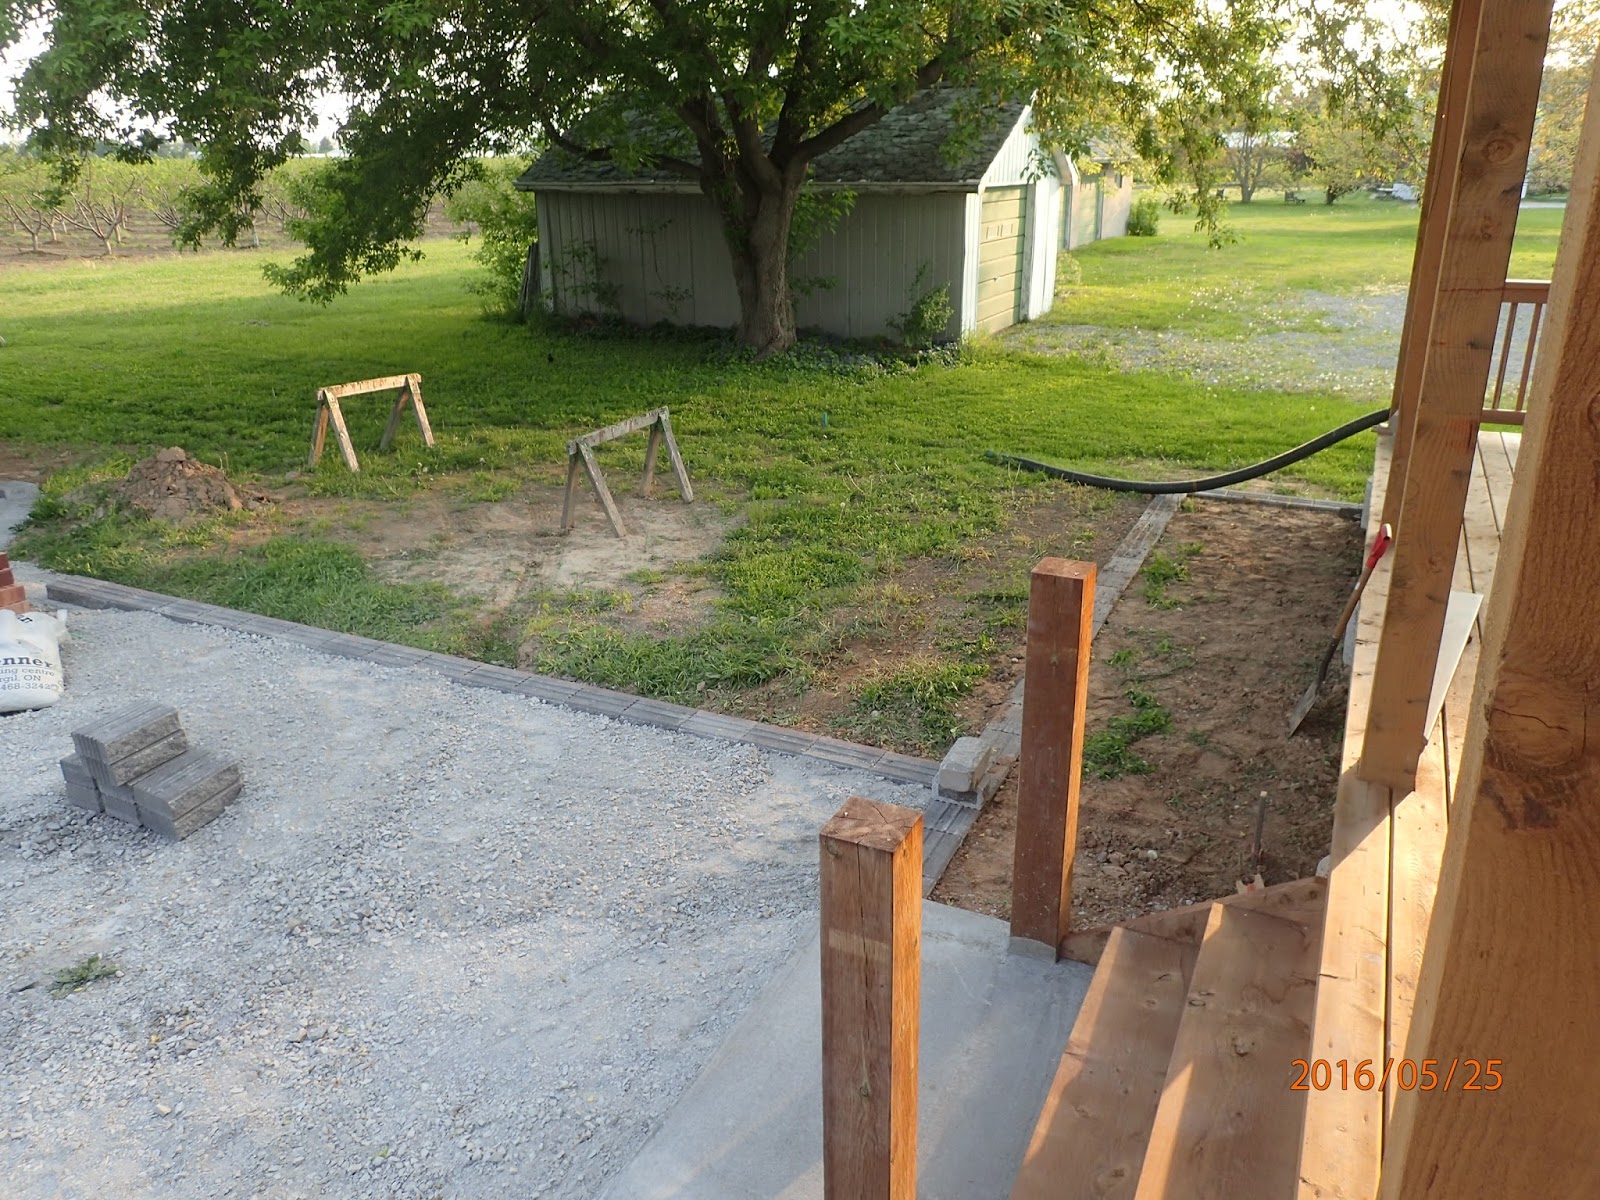
Next we spent a few days sifting dirt and spreading it out behind the rear deck towards the garage. Once we had enough dirt there we leveled it out rolled it down and then spread a little more dirt to bring it up to the level I wanted. Once it was all down we scratched the top with a rake spread some grass seed, raked it again, spread some more seed, raked it again, spread some more seed, raked it again and then rolled it. We then spent 5 days watering it off and on and we now have some green grass fuzz starting. I'll continue to keep watering it until the grass is well on it's way. Here is a picture showing the area I am talking about.


Now I had to go back to a specialty wood store near the middle of the month to pick up some for fir 1by6 for the deck trimming. While I was there I noticed a really nice piece of Peruvian Black Walnut they had. This was 20"wide by 12ft long. I thought this would be a great piece for the eat in bar top area in the kitchen. As the cost was only 250$ I decided to take it. Once we started working on it the first thing we needed to do was cut one straight edge down the 12ft. So we took some string stretched it from end to end and marked down a straight line trying to save as much of the width as possible. I then laid down a straight edge clamped it down and used this to guide my skilsaw. Once we had one straight edge we could use the table saw to cut off two 1.5" wide strips that I would glue to the bottom along the edge to give the impression of a thicker top than the 1" thickness that it was. Inside I screwed two pieces of 5/8" plywood to the top of the pony wall and then built three brackets from the left over walnut. These were varathaned and then installed before the top was installed. While this was going on we glued and screwed the small strips to the underside of the top in the garage and then rounded it over and sanded it all down before bringing it into the house for installation. I installed it onto the top of the plywood and then drilled and countersunk 6 holes to secure it to the top of the wall and then screwed up from the bottom of the plywood on the overhang to secure the top in place. We then plugged the countersinks with small pieces of walnut wood. Sanded the plugs smooth and varathaned the top. Here are some pictures showing the whole affair. The last picture is after one coat of varathane. I have now placed 4 coats on it and will most likely do at least one possibly two more coats.


Lastly we spent some time in the shop with my new/used jointer preparing the lumber for the 5 interior doors. First we jointed one face side smooth, then we planed the boards to the finally thickness. I then jointed one edge square to the face and then cut them down to the required width on the table saw. Here is a picture of all the rails and stiles standing awaiting the next procedure.


So for the month coming up I plan on trying to finish the doors and get them installed. I also want to finish the deck railing, spread some more stone around the house and possibly start on digging the last trench for a small retaining wall along the driveway between me and the neighbour. I guess you'll find out next month as to how I did. Until then for all you Americans Happy 4th of July and see you again in a month.

Harold


Sunday, 29 May 2016

Time for another update of the house that Harold built

Well I figured it was time to update you fine folks on what's been happening around here. Before I get into the house work I'd like to take this opportunity to advise you not to take any of my advice about appliances. Evidently I'm having a lousy track record in that department. The count is as follows, Central vacuum installed and then replaced due bad motor, Dryer fixed due to bad side wall and the drum kept hitting it, Dishwasher being repaired due to faulty pump motor for washing cycle, Fridge being replaced due to loss of coolant, Upright freezer has small problem with icing up at top of door but I'm living with that issue. And to top it off, due work cycle and issues getting the parts everything is taking an inordinate amount of time. Oh well can't cry over spilt milk.
As for the house this is what has been accomplished. At the beginning of the month I prepared the door jambs for the 5 interior doors. These door jambs are made from poplar lumber and will have three hinges per door as I am going to build poplar 5 panel doors for inside the house. Once they had been cut to size and the hinge recesses routed out we brought them inside and painted them. After they were painted we installed them on the Victoria day weekend which was 23 May. Here is a picture of the jambs installed.


I also spent some time at the end of last month building and installing a couple of small triangular shelves that fit into two corners in the living room. Later on I plan on installing a full length shelve above the windows as well for knick knacks. Here are two pictures one showing a close up of two shelves the other a shot of both corners showing the placement of the two shelves.


I next moved outside and continued working on the small retaining walls that go around the house and along one side of the garage to create walkway to the shed at the back of the garage. These walls are made up of what is called Wallstone and it consists of concrete bricks about 12"L by 4"H by 8"W. There is a base stone and then a capstone that sits on the base stone. These will provide a nice barrier and delineation between the grass and the house and the driveway and the grass. I finished the one on the east side I started last month and then I cleaned out the trench for the garage portion which had been started last year. Once these were done I dug out the trench along the back of the house and along the edge of the driveway connecting the back wall to the garage walkway wall. At the same time I dug out the area where I would be putting a pad for the stairs to the back deck. Once this was done I bored a couple of holes and installed pressure treated 6by6 timbers for newel posts for the stairs.I then placed compacted gravel in the pad and built a form for the concrete pad. After this was poured and cured we started installing the wall blocks along the back of the deck connecting the east and west portions already there. Once that was done we laid the wall between the back wall and the garage walkway wall. After they were all installed we went along and backfilled the walls with dirt on one side and gravel on the other side. The dirt between the back wall and the deck area was carefully tamped and sloped away from the house. This should help keep water away from the house and direct it towards the swale along the west side of the house. Here are some pictures showing the progress. First is completed east side, then the garage walkway. Third is the back trench with pad area. Fourth is the newel posts and pad poured with the next one showing part of the back wall. Sixth and seventh show the completed first layer. As mentioned a second layer will go on top and then we'll continue working on grading the gravel and dirt upto the walls.


Between this all we also took some time to build the railing along the west side of the back deck. This railing needs to be built to code as the deck is more than 24" above the ground. This railing is made of clear cedar 2by4's with a top rail 2by6 and then 2by2 spindles. The spindles are 3.5" apart which is just a little closer than the code required 100mm. Here are two pictures of this railing. The second is a bit of a closeup showing the clips used to hold the railing in place.


 Well that's all for now. I see that summer is finally here, we are in the low 30's C around my house. So far no air conditioner needed inside however only time will tell when we start it up.
Until next time keep cool and watch out for sunburns.

Harold


Saturday, 30 April 2016

Time for an update to the story

Well I guess its time to give you an update as to what has gone on around here. I'll start with a small project that I build early in March. I decided to make a small cart that could be rolled back and forth into the small cupboard above the basement stairs beside my office desk. This cart would have two levels and be just wide enough and long enough to fill up most of the floor space in the cupboard. Once complete I placed my larger inkjet printer on the top shelf with some small items and placed a few other items on the lower shelf. This is now wheeled into the storage area to free up some floor space in the house. Here are two photos showing the cart empty and then filled. The uprights on the left side are the handles used to move it around.


For the rest of the  month I worked a few extra days and did little in the house. I did find some time to clean  up the garage enough that I could bring the remainder of my tools to the garage from Mom's garage. I now have just a few items left at Mom's to bring over.
For the first week of April I spent time in the garage building a few cupboards to store items and arranged the tools around the perimeter of the garage. Some items may still move around but I think the large tools will stay where they are. I took the second week of April off from work and used the time to do some more work around the house. I finished up the Board and Batten on the rear deck and here's a picture showing the almost completed work.


With that done I could hook up my gas line for the BBQ and have even had the first BBQ on the deck. I still need to get some furniture and finish cleaning off the deck before the first full dinner can be had out there. Along with waiting for warmer weather as well. However, the weather was warm enough that I could spend time moving and sifting dirt from the topsoil pile that was at the front of the house. This dirt was spread over the ground at the side of the house and the front as well. Before doing this I carefully staked out the area and used a builders transit to site the area and calculate a proper slope to allow water to run away from the house and then down a swale to the front of the house and into the ditch along the road. I have managed to get a 1.5ft slope from rear of house to the front ditch a length of 110 ft. Once the dirt was spread out I leveled it and then rolled it. I then added more dirt where needed and rolled it again. Once the ground was all leveled and rolled I used a rake to loosen the top portion and spread out some grass seed. After the first spreading I raked it again and then spread out some more grass seed. Once this second layer was down I raked it again and then rolled it to ensure the grass seed would stay in place. I then watered the area and Mother Nature was kind enough to water it as well over the past week. After ten days I see the grass has started to grow. Hopefully in an other week it will actually look green there. Here are some photo's showing the side of the house and the front of the house during and after the seeding was all done.


After this was done I spent some time making up a small bench for installation at the rear entrance. This would be used to sit at while putting on your footware. The framework was made from some of the leftover Oak used for the board and batten and the top was make from Maple and Teak strips. Here is a picture of the seat in the back entrance. 


Lastly I took some time to line up and calculate some heights for the next small retaining wall outside. This wall will be along the East side of the house from my back entrance towards the rear of the house. I then bug a trench about 4-6inches lower than the first course of stone and filled it with tamped down gravel. Either next week or the following I'll install the actual stones on this base. Here is a photo of the area.


For the coming month the plan is to work on the door jambs for the interior doors and possibly start work on building the doors as well. Also I want to do more landscaping outside. I need to build one more set of steps to the rear deck and I also need to look at putting up the trim over the decks as well as finishing off the railings. How long all this takes depends on weather and how much time I have. 

Lastly I now have all my appliances in the house. The last three arrived on Apr 12 which was the stove and washer and dryer. Since the dryer and the stove were Natural gas I had a gas fitter come in and hook them up. Unfortunately the dryer went "clunk, clunk, clunk" once it was turned on. Turns out the drum was hitting the skin panel. Also unfortunately the repair company and or Maytag screwed up and sent the wrong colour panel for the repair. Then the second panel they sent was damaged in shipping. So 18 days later I still do not have a working dryer. They now hope to fix it this coming Tuesday providing the panel shows up and it's the right one and undamaged. 

So that's all for now. See you again maybe towards the end of May or if something big happens sooner.

Harold


Saturday, 5 March 2016

Well thought it was time for an update.

I really have not done much over the last few weeks. I guess my drive has slowly petered out. Oh well as long as I have suitable living conditions there are no worries. We did though manage to do some small work.
Since last we spoke I took receipt of a brand new LG Fridge. This is a french door version with door in door which allows you to access certain items without opening the door to the entire fridge. For those interested it is LFXS30766S. I initially tried to save a few pennies by reusing a compression fitting for the water supply but that had a slow leak so of to the hardware store to buy some new fittings and once installed no leaks. After 24hrs with no leaks we slide it into place. I also spent some time finishing off the quarter round under the kitchen counters. All that's left is the area in front of the stove. I will need to remove my stove platform once I buy a stove to allow the installer to hook up the gas line. I also spent time trimming out the back entrance area. We're all done with the exception of the baseboard around the laundry platform. I ran out of baseboard so will need to buy some more and then take the time to give it a couple coats of paint. However it still looks pretty good. I also managed to find some time to setup and get my Grandfather clock up and running. I needed to build a small bracket that is mounted to the wall and is at the height of the top of the clock. I then drilled some holes through the back skin of the clock at the top and installed some bolts with a few springs into this bracket. This will prevent the clock from falling forward when the door is opened to rewind the system. It looks great and even with all the moving around seems to be keeping pretty close time. Finally today I took the time to install the floor transitions that cover the gaps between the floors under the future doors. These were installed with some nails and silicone so there are weights on them for the next few days while the silicone cures.
I have also started to spend some time in the garage installing shelves and cupboards to be able to store all the small tooling and other associated articles. I still have not finalized the final positions of all the machinery but am getting closer to the final layout. We're supposed to have some nice warm weather next week so hopefully on Tuesday and Wednesday I can finally sort out the majority of the garage issues. So here are a few pictures showing the work. First is the back entrance, second is the extra shelving, third is the fridge in place, fourth is the clock in place, fifth is the bracket holding the clock vertical, and finally a pictures showing the floor transitions with concrete blocks as weights while the silicone dries.


I don't expect to update this blog again for some time as the next work to be done on the house will be making the doors for the rooms and the kitchen cabinets. I don't plan on  doing these until the May time frame. As well I cannot do any exterior work until the weather warms up, again the May time frame.
With this in mind have a great spring and we'll see you towards the Apr/May time frame with the next update.

All the best

Harold

Saturday, 20 February 2016

Just a short update today

Well over the last few weeks we did get some stuff done but the rate of work has definitely slowed down. Essentially we finished the flooring in the back entrance. This was accomplished by laying down a 1/4" underlayment first and then laying down the Vinyl Kronix flooring. This flooring is from Germany and is 100% waterproof. It is laid down like engineered flooring in that it is a click lock system. It was real easy to install and cut really nice with a sharp chopsaw blade. The only issue was that the static electrical charge kept the plastic flakes stuck to the floor so each piece and the floor was vacuumed prior to installing the cut piece. Here are two pictures showing the flooring in the back porch. First the underlay and then the finished product.


Speaking of vacuuming, I installed my central vacuum cleaner on Tuesday the ninth. I then installed the floor and used the vacuum to clean the tiles before installing. I thought the vacuum was a little loud but once finished and when I went downstairs I realized that it was not only loud but broken as there was a strong electrical smell in the basement. So contacted the company and they said send it back. Once they received it they opened it up and said yes the motor was shot. They believe something must have fallen into at some stage and once installed and running just ruined the motor. So they installed a new motor and shipped it back. Reinstalled it and it runs a lot smoother now. I still think the motor will need to run a little longer to really settle down but the difference is quite noticeable. 
Next big project for me was to work on the sink. When the countertop company installed the sink they used an industrial silicone to attach the sink to the underside of the counter. Although I trust the bond I really don't trust it that much. So I devised a safety strap system to mount under the cabinet to provide just a little more support and piece of mind. Essentially I installed two hooks into the cabinet walls on either side of the sink just below the countertop level. I then cut and sewed up two straps with rings at either end. The one end went into the hook on one side and the other ring went into a turnbuckle that was hooked onto the hook on the other side of the sink. I then tightened the turnbuckle until a suitable tension was established. I did this twice to provide me that piece of mind I craved. Here are three photos showing the parts, the installation and then a better look at the installation on one side of the sink.


I then spent some time arranging the items in my kitchen as I emptied out all the boxes that held my kitchen stuff. Lastly I installed the remaining trim around the patio door and the baseboard in the eat in bar area. I also cut sanded and varathaned trim work that will cover the gap between the flooring and the kitchen cabinets. Along with this trim I have also cut out and am varathaning the 5 floor transitions that will be needed under the doors from room to room between the different floors. 

Well that's it for now. Hopefully see you again in a couple of weeks with some more updates.

Harold


Saturday, 6 February 2016

Flooring is almost done

Well a pretty simple week. All we did was install flooring on Tuesday and Wednesday. For the rest of the week I worked.
On Tuesday we managed to install all the flooring in the hallway and just into the kitchen area. It took longer than last time because of all the cutting around doors. Around the christmas time I moved the table saw and chopsaw into the garage. So every time I had to make a cut necessitated a trip from house to garage. On top of that it was time for a visit to the Dentist so that lost an hour or two as well. Oh well I'm not exactly speeding for the finish line so being a little slower doesn't mean as much as it use to. On Wednesday we finished the floor in the kitchen area and then went into the back entrance and installed a subfloor on the laundry pedestal and then laid down some commercial grade vinyl. That folks was it. I received my central vacuum system that I'll install next week as well the click lock vinyl flooring for the back porch came in so this coming Tuesday and Wednesday will see me installing the flooring in the back entrance, installing the central vacuum and then starting on finishing off the trim work. I'm hoping that by the end of the month I'll have another appraisal done on the house so that I can finalize my paperwork to be able to claim back some of the sales tax that I spent on building the house. Theory has it that I should be able to get back about 50% of the sales tax I spent. Only time will tell if they agree and rebate me this amount or if they decide I'm only entitled to a lesser amount. Anyway here are a few pictures showing the flooring in the hallway, the kitchen and then on the laundry pedestal.


Well that's it for now. Not sure when the next update will occur but it will most likely be a few weeks down the road once I've managed to get some of the trim work completed. Enjoy the mild spring and think warm thoughts for an early summer.

See you

Harold

Saturday, 30 January 2016

Short update on the kitchen

Well the only thing that happened this week was the installation of the tiled backsplash. I initially started on the north wall which has the fridge and stove in it. We then went around the corner to the sink. I kept this tile level all the way around and stopped right beside the window. The reason for this was that if I tiled under the window area I would have to cut a lot of tiles since they did not fit without cutting. Therefore I decided to install one piece of solid surface countertop as a backsplash under the window. I therefore am having the countertop people cut and polish a piece about 39in by 6.5in for this area. After we finished this area I had the Sister and husband in to talk about how to finish the other side. We  all agreed that continuing at the same level and then going over the small table top would be a good way to finish the tiling. With that decision done I tiled the small area that will be under the eat in counter area on the south wall and then finished off the east wall over the countertop and then over the table top area. This work was all done over Tuesday and Wednesday. Today we spent the morning and early afternoon grouting all the tile work. After cleaning it off a few times and once the grout was more or less set I reinstalled the plugs and switches and that's where we sit at this time. So now that this work is done I can start bringing up the boxes with all my kitchen stuff and start filling in the drawers and cupboards. I still need to finish installing the under cabinet lighting and later this spring I'll start working on building cupboard doors. But for now we have a reasonably functional kitchen, or at least we will after I buy a fridge and stove. So here are some pictures showing the tile installation and then what it looks like after the grouting was complete.


Well I hope that by the end of Wednesday I'll have the remainder of the floor installed and possibly working on some of the trim if I get enough painted. After that I'll work on the flooring in the back entrance. I want to get that done before I get the laundry machines installed.

Well that's all for now see you next week for another installment.

Harold