Saturday, 24 October 2015

Living room is looking good

Well we had a little change of plans. Instead of starting on the kitchen cabinets this week decided to finish the trim in the living room/dining room area. Oh well just means we start the cabinets at a later date.
So last Sunday we  gave the wainscoting it's 3rd coat of varathane over the whole area. Then on Monday after work we just varathaned the top rail of the wainscoting. This will probably get one more coat before we finish the trim on it.

On Tuesday we spent some time in the morning painting up the majority of the trim that will be required in the Living room, Dining room and Kitchen area. As mentioned before because of the way I am building the house and living in it I paint the trim at least twice before installing it and then once the nail holes are filled in and smoothed over I carefully go over most of the trim with a third coat of paint. After going to a noon hour appointment came home and finished installing the trim for the Master bathroom and closet area. As you'll see in the photos there are no doors however you will notice a closet rod in the doorway area. I will be installing a curtain as door way instead of solid door. I expect that most of the time the curtain will remain wide open. So here are two photos showing the trim painted and the doorways trimmed.


On Wednesday I gave the trim it's second coat of paint and then proceeded to mix up the grout I was going to use to grout the tiles above the shower in the spare bathroom. Unfortunately I probably added about 30ml of water too much. It took over 45 min for the grout to set-up enough to allow me to spread it out on the vertical shower walls. Once installed in the tile slots it set up normally. By the time I had spread out all my grout it was time to start wiping down the tiles where I had started installing the grout. After an initial cleaning we waited an hour and then cleaned it once more. Then I gave it a final wipedown about 3hrs later. I still need to seal the grout but it looks good. I did learn one thing though. There is green painters tape and blue painters tape here. I was always told the blue stuff was the better product and had lower adhesion capability. Well I use it and the green tape to tape paper up on the ceiling and side walls to protect the area from grout. Well the blue tape peeled paint away and the green did not. So we now need to touch up the ceiling before we paint the walls in the bathroom. Anyway here is a photo showing the completed tile area in the shower stall. It actually turned out quite well and I actually like this tile better than the tile I used in my Master bathroom. However I am not going to change it.


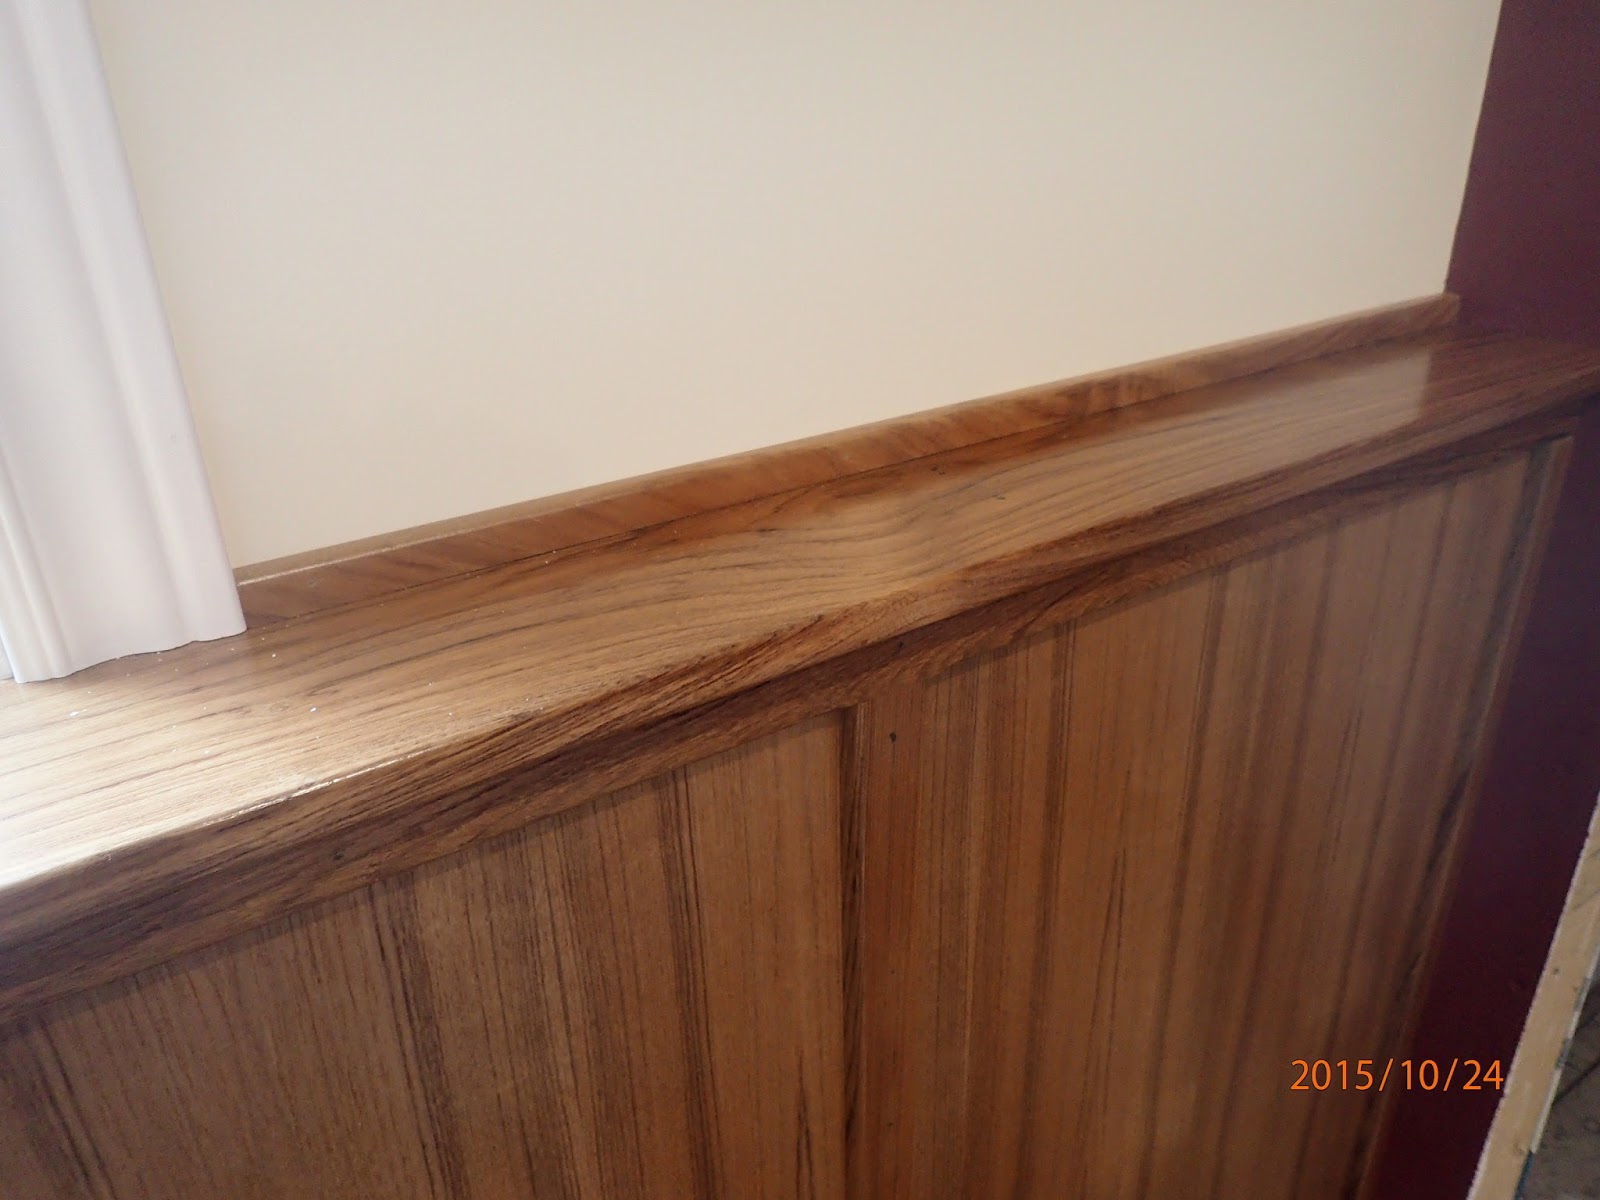
Next day we worked on the house was today, Saturday. Today we spent time working on trimming out the small bookcase and all the windows in the Living room, dining room and kitchen area. Area as well we installed the teak trim on the top of the wainscoting. It actually went really nicely and all that it needs now is the final coat of paint over the trim to blend in the nail holes after being filled with wood filler. Here are some shots showing the trim work as well as a close up of the teak trim.


So as of now will spend some time on Sunday painting the bathroom ceiling and then the trim. Once that is done will cleanup the bath and bedroom in preparation for painting the walls. As well I'll make up my materials list and start work on the upper cabinets for the kitchen area. So until next week have a great time and be careful next week Saturday with all the kids walking around for trick or treat on Halloween.

Harold


Saturday, 17 October 2015

Well we're back to work so the process slows down.

Well went back to work this week after two thanksgiving dinners. Because of all this the amount of work down went down however the result is in my mind astounding.

So on Sunday we prepped all the teak pieces for the top rail of the wainscoting. Because of the length of some of the pieces we needed to joint two boards for two sides. As well we would need to joint the boards in the corners. To do this we used biscuits. As we went along and dry fitted the pieces I was quite happy to see that only one corner needed to have the angle cut adjusted slightly to allow the two pieces to fit together snugly. After this was done went over to the Sister's place for Thanksgiving Turkey with Mom and the Sister's kids and inlaws.

On Monday fully installed the top shelf of the Wainscoting and also managed to give it it's first coat of varathane. Once complete the top rail will have between 5-6 coats of varathane and the plywood body will have 3 coats. Here's a picture showing the top rail installed with its first coat of Varathane.


Once this was done the Brother showed up for a tour with the clan. After their stamp of approval we went of to Mom's house for a family supper. 

On Tuesday I continued working on the wainscoting by starting to install the trim that would frame out the panels in the work. We cut up all the teak we had and once down calculated how much more we would need to buy to finish the job. As well I needed to install some "fill out" strips on the patio door to flush out the jambs to allow me to install the casing at a later date. As well this strip had to be installed prior to the last piece of teak was installed that would butt up to this fill out strip. 

On Wednesday we finished of the trim work and gave the wainscoting its first coat of varathane.
Here's a photo showing the completed work along with its first coat of Varathane.


The small strips on the saw horses are the pieces that will be used to cover the flooring joint by the baseboard as well as the small gap along the wall where the top rail is installed. This top portion will go in once the window casing is installed and the bottom portion once the Bamboo flooring has been installed. I hope to order this flooring within the next week or so.

On Thursday we went back to work so all we did once we got home was sand the wainscoting and give it its second coat of varathane. 

On Friday went out for dinner so no work and to be honest after work on Saturday I just did not have the energy to do more than sand the wood slightly and get it ready for its third coat of varathane. 

So next week I plan to finish varathaning the wood and start to work on the kitchen cabinets. As well if there's some spare time I might also try and finish the grouting of the bathroom tiling and start painting the spare bathroom and bedroom. So until next week keep warm because I hear that snow has reared its ugly head in some areas near me. I really wish we could keep the temperature a nice
21degrees C  for 364 days a year and then just one day of snow for the kids on Christmas. Oh well I can dream can't I?

See you all next week.

Harold


Saturday, 10 October 2015

Working with Teak can be real expensive

Well it's been an expensive week. Bought a bunch of solid teak wood for the wainscoting and had a solid surface countertop installed in the Laundry room. However at the end of the day it was all worth it. So let's get onto what happened this week.

So on Monday we started work on finishing off one portion of the wainscoting. The top edge will get a 5" piece of teak. Then on top of the plywood will be 1/2" pieces that will form squares and cover the joints of the plywood as well. At the bottom will be a 5" piece of teak as baseboard. Once the floor is installed I'll finish this off with a smaller piece of "quarter round" trim to hide the edge of the flooring. I decided that the lower sill of the four windows that are over the wainscotting will have a teak lower sill and then the rest will just be finger joint pine painted white. So first thing we did was cut out two pieces of teak, one for the top of the wainscoting and a smaller one for the window sill. Since these two pieces are on the same level they needed to be joined together. This was accomplished using a biscuit jointer. While the glue was drying I took the time to start finishing off the top  and sides of the wall alongside the stairwell. This also received a teak treatment. This time the boards were 6.5" wide to accommodate some casing under the edges and still leave a little reveal. The third project was to install some of the leftover teak plywood pieces into the small cubby hole above the staircase that will be a small bookcase and storage area. The layout worked out as the joints were covered by 1by2's that will support two shelves. As I've done for the last few days I occasionally moved a few boxes into the house from the garage. Actually by the end of the day almost all the boxes were moved now we just need to move some of the larger furniture. Here is a picture showing the dividing wall with some teak facing on it and secondly the bookcase cubbyhole with teak installed.


On Tuesday we continued working on various trim pieces. We sanded smooth the top piece for the wainscoting and then proceeded to give it three coats of oil modified water based varathane. I'm really pleased with this product as it is giving the wood a nice colour and it cleans up with water. We also varathaned the teak facing on the dividing wall with three coats as well. 

On Wednesday it was a continuation of working on the trim and painting and varathaning various pieces as well. I usually paint or varathane a lot of the trim before installing it over painted surfaces so that I don't have to worry but getting paint on the wall. Once installed and the holes filled with a suitable material then I come along and very carefully apply one final coat of paint. Nice thing is I don't have to do the edge near the wall since this has two good coats, all I am doing is one final coat to cover the nail holes and the joints. 

On Thursday we installed the casing underneath the teak on the dividing wall as well we installed the majority of the trim over the wainscoting panel on the one small part I was working on. Later in the afternoon the countertop company came in and installed the quartz solid surface countertop for my laundry area. One other thing we finally did was finish off the vent stack for the plumbing. When we installed the plumbing the vent stack came out of the house at a 45deg angle. The reason was to avoid putting holes in the roof. I needed to finish off the soffit and facia before we could finish the vent. During the summer did not want to climb up on the hot roof and possible damage the shingles so waited until it cooled down. Today was a nice cool clear day. So we got out the large ladder and secured it to the house with a tie down strap, then placed a 4by4 on the roof in front of the ladder supports, this supported a second ladder that I laid on the roof. This setup prevented the second ladder from sliding down. I then climbed up the ladders and installed a piece of plastic lumber on the facia and secured the vent to this such that it sticks up above the roof the prerequisite amount. Here are a few pictures showing the completed dividing wall with all the trim installed. As well the small wainscotting area with two coats of varathane. Then the countertop installation and finally the completed vent stack outside.


On Friday we finished tiling the spare shower with the exception of the last row which needed to be specially cut. This was done and then installed on Saturday. We then spent a little more time working on trim and varathing pieces and painting pieces for the two doorways in the master bath and master closet area. As well I had been varathaning a transition piece to cover the gap between the tile and the flooring between bath and bedroom. This is a piece of Black Walnut with walnut stain. Here is a picture showing the tiling of the shower. We added an accent row for looks and so we did not have a small sliver row at the very top.


On Saturday we spent the majority of the day working on cutting and preparing all the teak and pine for the window trim as well as the wainscoting trim for the remainder of the wainscoting. Since Teak is not the cheapest of materials you want to make sure you use the pieces to their maximum efficiency. This meant that I needed to carefully straighten a few boards before cutting them down to size. Since I don't have a long fence to do this with on the tables saw we did it the old fashioned way. I carefully made to marks at each end of the board 1" in. I then stretched a string from mark to mark and then went along and made 1" marks back from the string towards the edge. I then connected the dots and carefully cut this sliver of on the tablesaw by free hand. A little touch up from the belt sander and we had a nice straight edge. Once this was done I could cut out the 5" wide top pieces and laid them out on the wainscoting edge. We then carefully measured up each piece and made the appropriate cuts so they would all join up nicely. As well we cut and marked where the window ledge pieces would go. Once this was done we took all the pieces down made all the slots with the biscuit jointer and then glued up the three sections for the three remaining windows. So here are two pictures first ons showing the string on the board for finding a straight edge and the second one showing the three sections glued up in the clamps drying. If you look closely you can see the 45deg cut on the one board. There are three corners and with the exception of one angle that was 46deg the other two were bang on 45's. No filler required there.


So we have a Thanksgiving dinner at the sister's tomorrow and then the brother is coming down on Monday so we'll have a second dinner then. So I don't expect to much work over the next two days. Thursday I head back to work so I hope by Wednesday evening to have all the wainscoting installed. Then I can varathane it in the evenings after work. Then paint the spare bedroom and bathroom, install flooring and lastly build and install the kitchen. Things are looking up and who knows maybe by the middle of next month I'll have a living room that I can relax in. 

So until next week have a happy Canadian Thanksgiving. 

Harold


Saturday, 3 October 2015

And the work continues

As I said going stir crazy not being able to do much work so relegated to doing small light jobs. But at least we continue to move forward. It's amazing what a nice lawn does. I've had numerous people stop and compliment me on how my new lawn has progressed. I've even been asked what was my secret for such a nice lawn so quickly. Just shows that people are still looking around and not fixating on the road ahead. Unfortunately with the cooler weather and inability to move wheelbarrows of dirt the remaining lawn seeding will happen next year. On a sad note I'm sorry to say Drew your plants have finally started giving up the ghost. I guess they just don't like overnight temps in the low single digits. Anyways onto the story for this week.

On Monday we finished making and installing the doors for the Laundry cabinets. After test fitting them all we removed them and prepared them for a coat of primer. Here are two pictures showing the doors prior to being removed.


On Tuesday we just spent some time priming all the doors on both sides.

On Wednesday we first went to the Doctor's office and had my stitches removed. The Nurse who did the procedure advised me that it looked real good and that starting next week Monday I could start some serious bending and stretching of the and wrist area to get everything back in shape. Based on our conversation it looks good for going back to work on the 15th of October. Thankfully I'll be getting a paycheque again. Later that day we spent some time putting the first coat of Semigloss white on all the doors and drawer fronts. Here's a picture showing some of the doors while they are drying after their coat of paint. Let me tell you they're right, it's painful watching paint dry. Had to leave and visit Mom for a while.


So Thursday morning took a road trip to Exotic Woods in Burlington to pick up my Teak plywood. What a place they had all sorts of wood that I'd never even heard of. If anybody is looking for exotic wood that lives in the Golden Horseshoe area of Lake Ontario that is the place to go. They're on the web Exotic Wood. In the afternoon we installed a few tiles over the shower and the cut out most of the tiles required to start the two side wall and to finish the last row on the back wall. Hopefully this coming week I'll be able to finish this job and then be able to paint the spare bathroom and the spare bedroom. I also decided that I better start moving the rest of my furniture and effects out of the garage and into the house. So I started by moving some boxes into the basement to be stored there until they can get moved to their final resting place as the house gets finished. I want to get everything moved before the weather gets too bad. As well I've noticed that some of the furniture is getting a little mold on it from the humidity of the air in the garage.

On Friday we gave all the doors a second coat of paint on the face of the doors in the morning. Later in the evening we managed to install the lower cabinet doors and the drawers. The upper cabinet doors were not installed in case I decided to put a third coat on them. In between we made a few trips back and forth with the dolly moving boxes. This will take a few days as I am not pushing myself and damaging the incision that is healing nicely.

Today we installed all the teak plywood for the wainscotting. Actually went pretty well with one minor exception. I had all the pieces laid out to match as close as possible to their neighbours. When this was done I had two pieces that were darker than the others. This would not be an issue as I had one small wall that only needed two pieces so that's where they would go. However as I was cutting out the last electrical box opening on the last piece before this short wall I dropped my jigsaw and punched a small hole through the sheathing. So one of the darker pieces now had to be moved into its place. Luckily this was in a corner so that both darker pieces now occupy either side of the corner. It all worked out but there were definitely a few cuss words spoken when the incident occurred. Once this was done we decided to install the upper cabinet doors and then I installed the two taps on the copper stub outs for the laundry sink. When building the base cabinets I knew that the cold pipe was going to be close to the outer cabinet wall. The intent was to install the tap before installing the cabinet. However I went a little to fast building the cabinet and forgot to install the tap. Luckily Lennox makes a small tubing cutter that can cut off a pipe within a 1/2" of the wall. So we bought one and it worked like a charm. Actually much better than the other small cutter I have. Even worked better than the bigger cutter as well. So here are some pictures showing the Wainscotting and the completed cabinets as well as the two taps with the cutter I used on my hand.


Well that's it for now. Next week we have a counter top company coming in to measure up for a counter for the cabinets and I hope to start work on the upper cabinets for the kitchen. I also want to make a decision on the flooring so that I can place the order for this as well. So until next week have a great week and please ask for the heat to be turned back on. Waking up to 9C weather is not the greatest.

All the best

Harold


Saturday, 26 September 2015

Yeah we have Grass

Well I got bored out of my skull sitting around so checked into it and I was allowed to do some light work around the house while waiting for my hand to heal. This past week Monday was allowed to remove the cast so have even more mobility. Have my stitches out next week Wednesday and we'll see what the Doc says however expect light duties for another 2 weeks.
So as I said in the title we have grass. After 2 weeks this is what the front lawn looks like today.


So last week while I still had the cast on I managed to prime the lower cabinets, however it was not as easy as I thought it would be so decided to wait till this week before I did more work.
This week Wednesday I spent some time putting all the face frame pieces on the lower cabinets. In case I did not mention it earlier the carcass is made with Poplar plywood 3/4" thick and the face frames are made from 3/4" solid poplar lumber. For the lower cabinets I broke it down into 3 sections with the third section being the area where the laundry sink will go. In the other two sections I also built in two drawers. By the end of the day the cabinets were framed out and the drawer parts were cut out. Here are two pictures showing the lower cabinets and then the parts for the drawers minus the drawer bottoms. As you can tell by the second photo the drawers are based on the process of an interlocking corner and then groove for plywood bottom.


On Thursday we built the drawers and sanded and rounded over all the edges on the lower cabinets. I then test fit the drawers and realized my tolerances were to tight and had to spend some time sanding down the sides of the drawers where the drawer slides go to allow the drawers to move smoothly. Here is a picture showing all the parts awaiting paint.


On Friday and Saturday I spent time first putting a coat of primer on the cabinets and then a coat of semigloss on the lower cabinets. At the same time I coated the drawers with three coats of waterbased varathane. I still plan on at least one more coat of semigloss on the cabinets however I think the drawers are complete. Later on Saturday afternoon I installed 6 sheets of 1/4" mahogany plywood on the framework of my wainscotting. Later next week I plan to go to Toronto to buy 6 sheets of 1/4" Teak plywood to install over the Mahogany plywood. This will give me a 1/2" thick sheeting and a nice looking wainscotting. Here are two pictures showing the cabinets with 2 coats of paint and the second photo shows the Mahogany plywood installed.


Well that's where we're at as of now. Hopefully this coming week will allow some more work to be done and hopefully the Doc is happy with my hand and its progress. So until next week have a great fall.

Harold


Saturday, 12 September 2015

With a little rain some grass should grow

Unfortunately the little rain is turning out to be a fair amount of rain. So far at least the front lawn is holding out. However we still have it looks like 4-5hrs of rain in the forecast off and on. Then 4-5 days of sunshine. So we'll see what happens. So why am I talking about this well lets see what we did to cause this.

On Sunday morning and late afternoon and evening we moved some dirt around to get a layer of topsoil down on the front lawn.
On Monday I moved more dirt until the heat drove me inside. Once inside I decided I could finish off some drywall mudding in the basement. We spent a few hours finishing off the first coat of drywall mud in the second bedroom, the hallway and one of the two rec room areas. Now the only room not given a first layer of mud is the second rec room and the lower end of the staircase to the basement.
As well I installed a piece of Bamboo countertop in the kitchen area. When I built the kitchen area I built a wall to act as the back of one set of cabinets and to provide an area for a eat in bar area. At the end of this wall where it hits the exterior wall I built two small extensions for a small table there. One of the reasons for this was to hide the gas barbecue pipe that came up there from the basement and went out the wall for the BBQ. Well I picked up a piece of Bamboo countertop at Lowes on Sunday that was 6ft by 25in by 1.5in thick. The piece was cut down to fit, about 48in, and then installed on the small wall extensions. The top is quite heavy so all I did was lay down a decent layer of wood glue on the wooden wall tops and set the piece on this. I then laid down the first of many coats of water based varathane. I finished the day by cutting down to size some of the tiles that would be installed over the shower in the spare bathroom. Here is a picture showing the Bamboo table in the kitchen area.


On Tuesday morning the first thing we did after meeting the gang for coffee was to go to the lumber yard and pick up some 1/2" metal screening. I picked up a two ft square piece and nailed it to a frame work of 2by4's and proceeded to sift dirt for the front yard. Initially I spread out the topsoil but it included the odd stone and some larger clayish lumps. For the last inch or so I wanted no large lumps so I sifted the topsoil to remove anything larger than 1/2". This sifted topsoil was then spread out over the front yard area. I managed over the course of the day to spread out enough dirt to cover about 75% of the yard. In between working on the yard I also spent some time indoors to get away from the heat and the light rain. While inside I installed about 75% of the rear wall of the shower enclosure with tiles. I've decided that instead of cutting a thin strip to finish the wall off I would instead buy a 1" tile to act as a decorative border thereby allowing me to install full height tiles. This meant I had to leave the last two rows empty until I could find a suitable tile for use as a border. As well we put the final coat of paint on the upper cabinet carcass for the laundry room and varathaned the Bamboo counter twice during the day. Here is a picture of the tile work as it sits for now awaiting the decorative border.


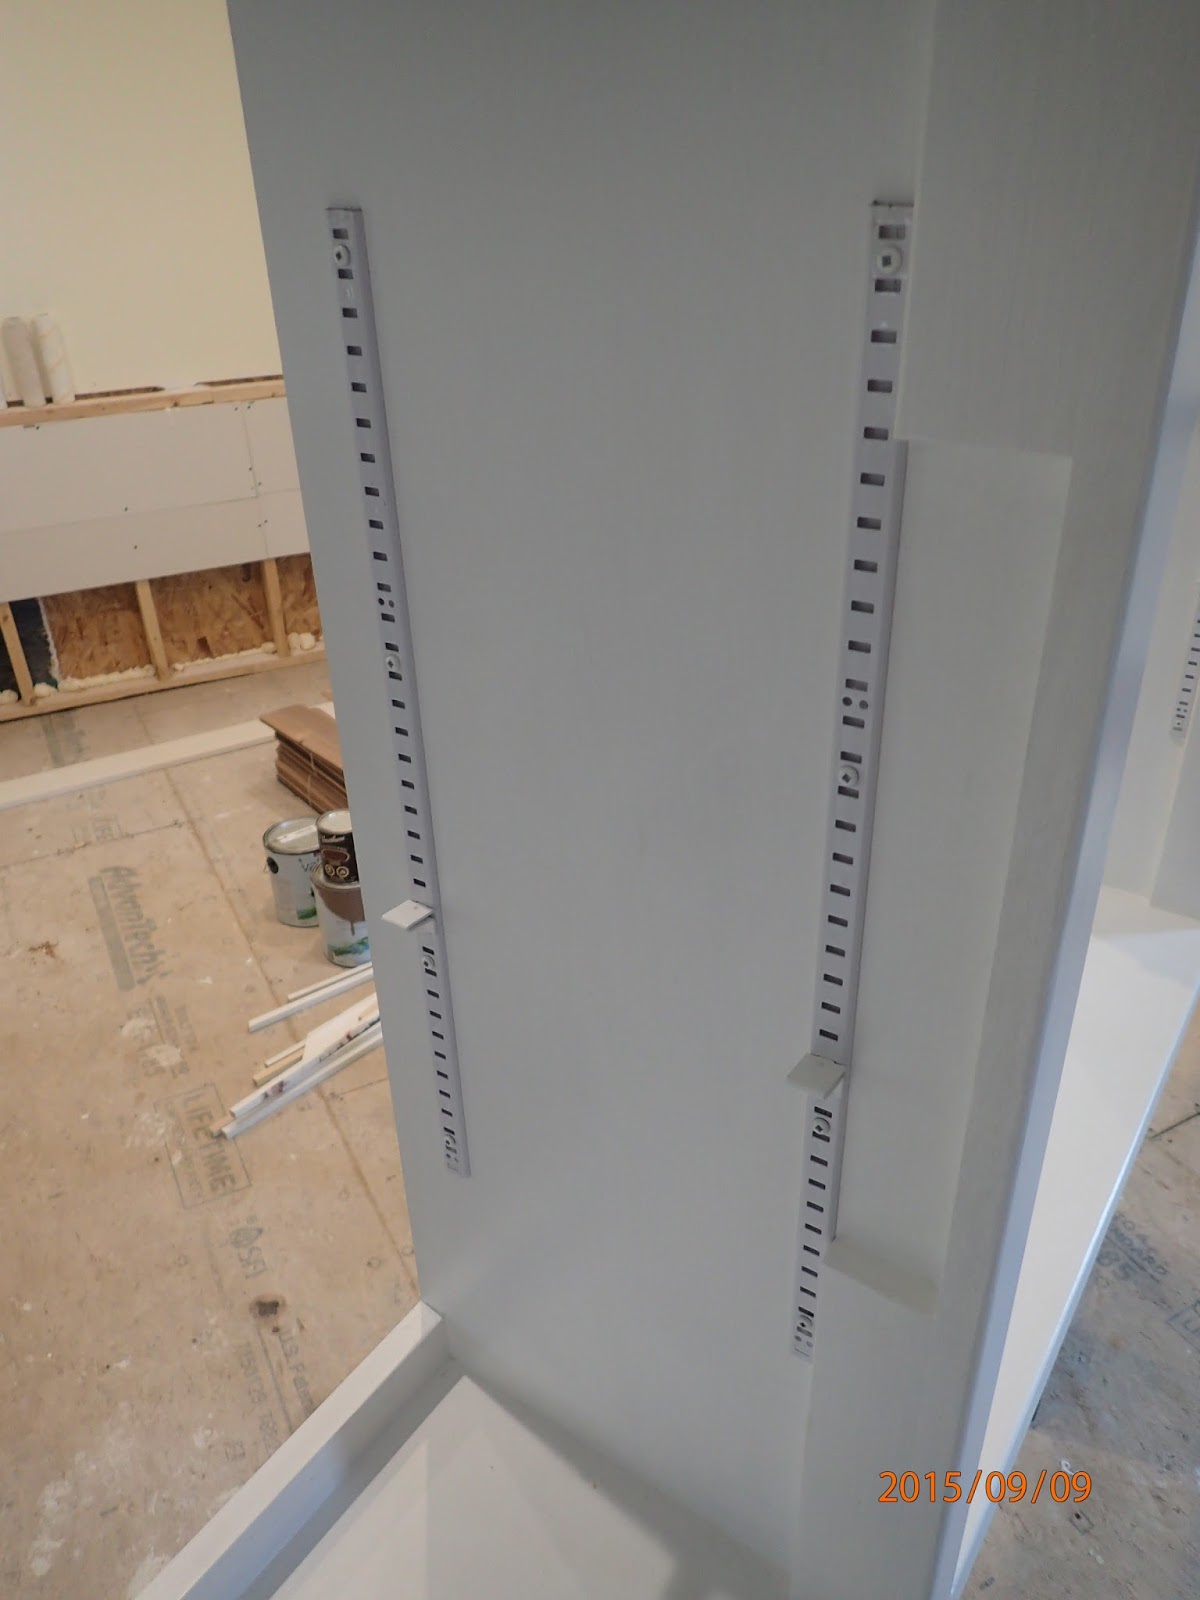
On Wednesday morning we finished sifting the dirt and spreading it out over the front lawn. I then rolled the entire lawn twice going north/south once and then east/west. Once that was done I took a lawn rake and scratched the surface to loosen up the lop 1/8"of soil. Next we went around and spread some grass seed. Again we raked the dirt to mix the grass seed in and then spread some more. I did this one more time before we again rolled the yard to ensure the grass seed stayed put. Now all we need to do is wait for some rain and sun to get the grass growing. Once this was all done I went inside and installed some shelf track supports in the upper cabinets before the sister and brother in law came over to help install this unit. The installation went smoothly with the exception of one screw. I had marked and predrilled holes in the poplar 1by4's so that I could install screws in every stud on the wall. Unfortunately one screw fell right on the plate that protected the ABS vent pipe in the wall for the laundry tub. So instead of 10 large screws holding it up only 9 are doing the trick. So here are three pictures, first one shows the front lawn after seeding and rolling, the second picture shows the shelf support track and the third shows the installed upper cabinet.


Some of you will notice the level sitting there. Yes it is bang on level. Later in the day I started work on the lower cabinets and the picture below shows their state at the end of Wednesday.


Well for the rest of the week I had to work however on Friday night managed to get a little bit more work done on the lower cabinets. I had hoped to have them at the stage that they might be ready for painting such that I could paint them next week while recovering from my minor surgery however with the rain today I did not bring home the plywood needed to finish the lower cabinets. So as of now this is what the lowers look  like.


Well due to the surgery mentioned above it will be a few weeks before I can get back to work on the house. About the only thing I might do is water the front lawn with my left hand over the next few weeks to try and get the new grass growing. So until I get back to work I will most likely not be writing any updates. I anticipate being back to work on the house in the second week of October so hopefully around 10 Oct I might have an update. 

Until then have a great few weeks.

Harold


Saturday, 5 September 2015

The Hill is barren and the grass is hopefully on the way soon

Well as stated the hill is bare. I guess people want to see pictures of this hill and weeds. Sorry I did not include them last week. For those who asked here are two pictures showing the work in progress and the size of the weeds.


Now that, that's done on to the work we did this week.
On Monday after work I spent some time backfilling the small retaining wall on the west side of the house that I built last week. 
On Tuesday I first started by pulling weeds and filling up the trailer for a second load of weeds to the dump. For reference here's a picture of a trailer load of weeds.


After we went to the dump I went to the local lumber yard and picked up some Poplar 3/4" plywood and some 3/4" solid poplar lumber. This material once brought home was turned into a carcass for some upper cabinets in the laundry room/back entrance. The lumberyard cut my plywood in half so I had 2 pces 24" wide by 96" long. This was easier to transport and easier for me to handle as well. Once home we cut one piece into 37" long pieces and then proceeded to rip these into 12" widths. Luckily the original panel was almost 49" wide so we had one 24" wide piece and one 24-1/2" wide piece. I now had 4 pces 12" wide and 36" long. I notched out two pieces on the back sides of these panels to accept a piece of 1by4 poplar. The lower piece of 1by4 was grooved to accept a pce of 1/2" poplar plywood for the bottom of the cabinet. I then cut down some more of the lumber into 1by2's for the face frame. The top pce was rabbited to allow the top of the cabinet to fit into the rabbit. I also rabbited the bottom pce to accept the three lower pcs that would make the base of the cabinet. Hopefully some pictures will help later on. Once all the pieces were cut and ready we started the assembly by dividing the four side panels over the 92" length of the 1by4's. The upper cabinet will be 36" tall by 92" wide. Later the bottom cabinets will also be 92" wide but they will end up around 40" high and 24" deep. The 1by4's were glued and screwed into the notches on the side panels. Then the upper front face 1by2 was glued and screwed followed by the top plywood. Once that was done we installed the three bottom pieces and then glued and screwed the lower 1by2 face frame onto the plywood. All that was left was to install the 4 pieces of face frame on the front of each panel as well I installed some 5/8" filler strips on the plywood behind the face frames in the location where the hinge plates will go. I did about half of this in the morning and then went outside to spread dirt while I waited for an appraiser to come by to check out the house for my bank. They needed this done before I can receive a Home owners line of credit/mortgage to  provide money to finish the house. Once he was done off to the lumber yard to pick up the screws I needed and then back home to finish building the carcass as described above. Here are some photos showing me cutting the plywood, then all the parts prior to assembly. Then we have a photo from the rear of the cabinet showing the 1by4's in place followed by a picture from the front showing the filler strips and the completed face frame. Later in the evening we pulled more weeds to start filling the trailer for the third and final load to the dump.


On Wednesday I started by finishing the weeds on the dirt pile and then taking the last load to the dump. Once this was done I moved the upper cabinet carcass onto the deck and proceeded to round over the majority of the edges as well as giving a final sanding with 120grit paper. As well I had earlier applied wood filler to the screw holes to fill them in prior to sanding. After sanding we touched them up with a little more wood filler and once dry sanded those areas again. After this was done spread out a tarp on the deck and proceeded to prime the entire cabinet. Unfortunately the humidity was extremely high that day so there were times my sweat was dropping onto the paint. However on the positive side the paint dried quite quickly allowing me to put the first coat of Semigloss on the carcass that evening. However this time I moved the carcass into the house on sawhorses so I was not sweating as much. In between painting went back to the lumber yard and picked up some more 3/4" poplar plywood and lumber for the lower cabinets. Their construction will be very similar to the uppers however larger and I will also have drawers in two of the sections. The third section will house a laundry sink. As well there will be an indentation at the bottom for a toe kick. After this was done we again went out in the evening and moved a few more wheelbarrow loads of dirt. Here are some pictures showing the carcass with primer and then paint as well a picture of some of the pieces for the lower cabinets.


On Friday evening we spread a little more dirt and then painted the majority of the uppers with a second coat of paint. 
On Saturday we spent the majority of the day moving dirt. However I did take a break around noon hour to spend some time building the stairs to the front porch. Once that was done and it was a little cooler again we went back to moving dirt. Here are two pictures showing the stairs which are functional just not complete, still need railings. As well the second picture shows the front yard after numerous loads of dirt, some racking and then rolling to pack it down. Once the entire yard has its first layer of dirt I will then carefully spread out more where it needs it and then roll it again. Once that is all done I plan on taking a leaf rake and loosening up the top 1/4" of soil and then spreading out grass seed. Then raking it again, spreading out more grass seed before rolling it for the final time. Then we'll need to start watering the yard however I hope mother nature will help in this.


Well that's were we are right now. I hope over the next few days to finish spreading the dirt out front and hopefully even get it all prepared for grass seed. The hope is to have this seeded prior to my going under the knife. I may not be able to do much work but I should be able to spray some water on the seed daily with my left hand. Well we'll how it goes. I'll let you know next week.

Harold